 WAR ATLAS MILITARY HISTORY MAGAZINE · WWI — WWII
Battle of Tarawa
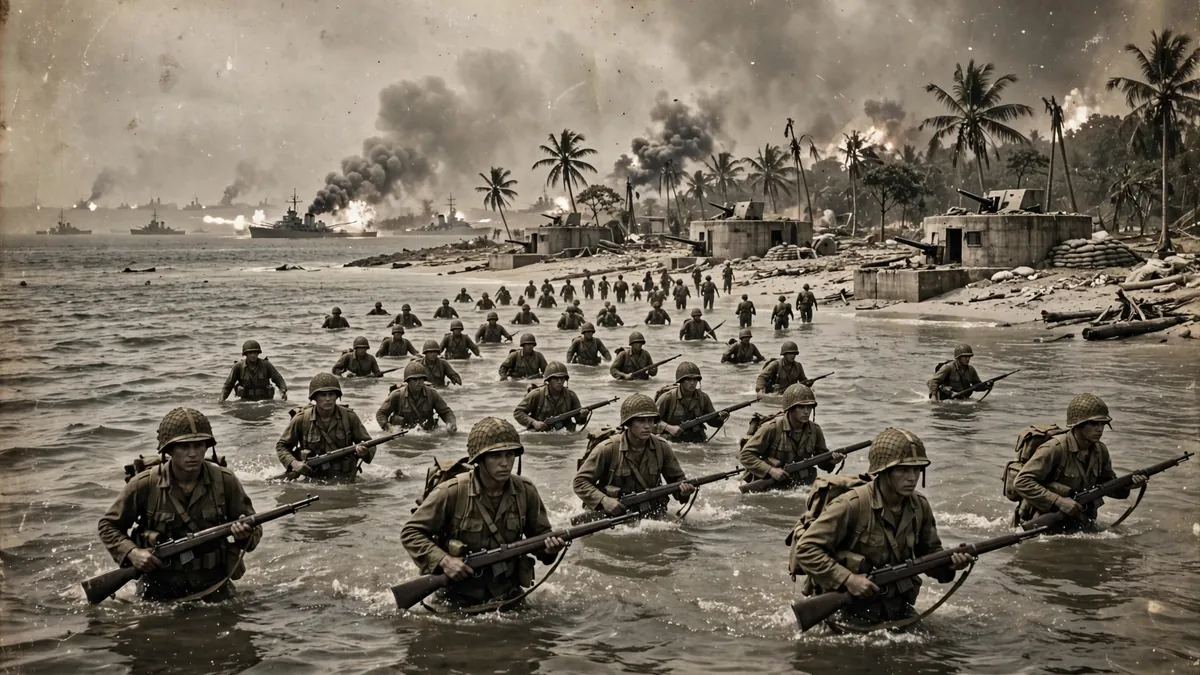
The Battle of Tarawa was fought from 20 to 23 November 1943 on the tiny Pacific atoll of Betio, and it was the bloodiest battle the United States Marine Corps had fought in the Pacific War up to that point. In 76 hours of fighting, the 2nd Marine Division took an island less than 3 kilometres long and less than 800 metres wide, defended by about 4,800 men who had turned it into a fortress of concrete bunkers, pillboxes and mines. The Marines lost about 1,000 men killed and more than 2,000 wounded — a casualty rate that shocked the American public when the photographs and the newsreels reached home — and almost the entire Japanese garrison was killed. Tarawa was a victory, but it was a victory that raised a terrible question: if taking a speck of coral in the middle of nowhere cost a thousand American lives, what would it cost to take the islands that really mattered?
Tarawa was the first American assault on a heavily defended Japanese island, and it was the test of a new kind of war. The Pacific War, after the victories at Midway and Guadalcanal, had become a war of island hopping: the Americans would seize one island after another, building airfields as they went, until they were close enough to bomb Japan itself. Tarawa was the first step on that road, and it was chosen because its airfield could support the next operation, the invasion of the Marshall Islands. The Japanese commander on Betio, Rear Admiral Keiji Shibasaki, had boasted that the island could not be taken by a million men in a hundred years. He was wrong by a matter of days, but the price of proving him wrong was so high that the American press and public demanded to know whether it had been worth it.
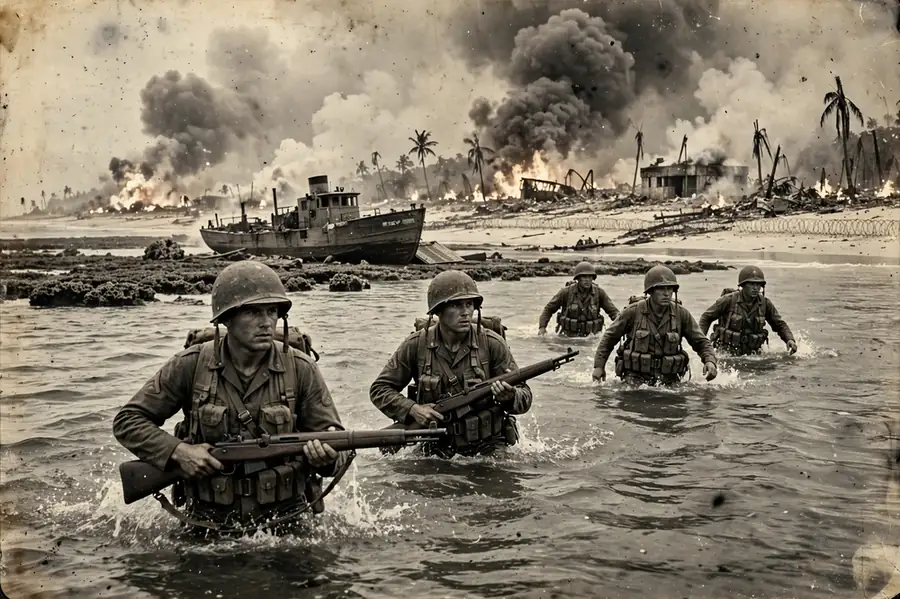
The battle’s most famous image is the one the Marines themselves remembered best: the first waves wading ashore through chest-deep water, hundreds of metres from the beach, under the fire of Japanese machine guns that had survived the heaviest naval bombardment of the war to that point. The landing craft had grounded on a coral reef at low tide, and the men had to walk to the shore, exposed, in the open, while the Japanese fired from bunkers the bombardment had failed to destroy. Tarawa taught the Americans that the bombardment of a fortified island had to be longer, heavier and more accurate, and that the landing craft had to be able to cross a reef. The lessons were learned in blood, and they were applied at Saipan, at Iwo Jima and at Okinawa — where the price would be higher still.
1. Key Facts
| Date | 20–23 November 1943 (76 hours) |
| Location | Betio Island, Tarawa Atoll, Gilbert Islands, Pacific |
| Result | American victory; Betio captured; airfield secured |
| American commanders | Maj. Gen. Julian C. Smith (2nd Marine Division); Rear Adm. Harry Hill (naval task force); Adm. Raymond Spruance (Fifth Fleet) |
| Japanese commander | Rear Adm. Keiji Shibasaki (garrison commander, killed in the battle) |
| American strength | About 18,000 Marines of the 2nd Marine Division |
| Japanese strength | About 4,800 men (about 2,600 Japanese soldiers and about 1,200 Korean labourers, plus about 1,000 naval troops and construction workers) |
| American losses | About 1,000 killed and more than 2,000 wounded (see Casualties section) |
| Japanese losses | About 4,690 killed; 17 Japanese prisoners and 129 Korean labourers survived |
2. Background
The Road Across the Pacific
By the autumn of 1943, the Pacific War had turned. The Japanese had lost the initiative at Midway in June 1942 and had been ground down at Guadalcanal, and the Americans were ready to go on the offensive. The strategy was island hopping: the Americans would seize a chain of islands across the central Pacific, building airfields on each one, until they were within bombing range of Japan. The first step was the Gilbert Islands, a chain of low coral atolls about halfway between Hawaii and the Marshall Islands, and the key to the Gilberts was Tarawa Atoll, whose main island, Betio, had an airfield. The operation to take the Gilberts was codenamed Galvanic, and it was commanded by Admiral Raymond Spruance, with the landings carried out by the 2nd Marine Division under Major General Julian C. Smith. The plan called for the Marines to land on Betio on 20 November 1943, take the airfield, and then move on.
Why Betio
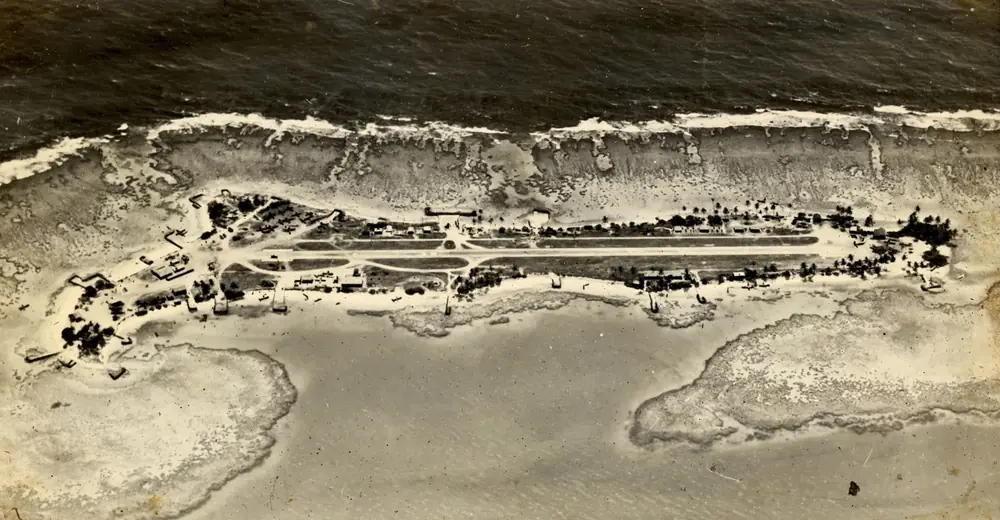
Betio was chosen because it was small, because it had an airfield, and because the Americans believed it could be taken quickly. The island is less than 3 kilometres long and less than 800 metres wide, a flat spit of coral sand with a lagoon on one side and the open ocean on the other. The Americans believed the island was defended by about 3,000 Japanese, and they believed the naval bombardment would destroy the defences before the Marines landed. Both beliefs were wrong: the garrison was larger, about 4,800 men, and the defences were far stronger than the Americans knew. The Japanese had spent a year fortifying Betio, and they had done it well. The American intelligence, based on aerial photographs and on the reports of a submarine reconnaissance, had underestimated the strength of the defences, and the planners had set the bombardment too short and too light. The mistakes were not discovered until the Marines were in the water.
The Fortress of Betio
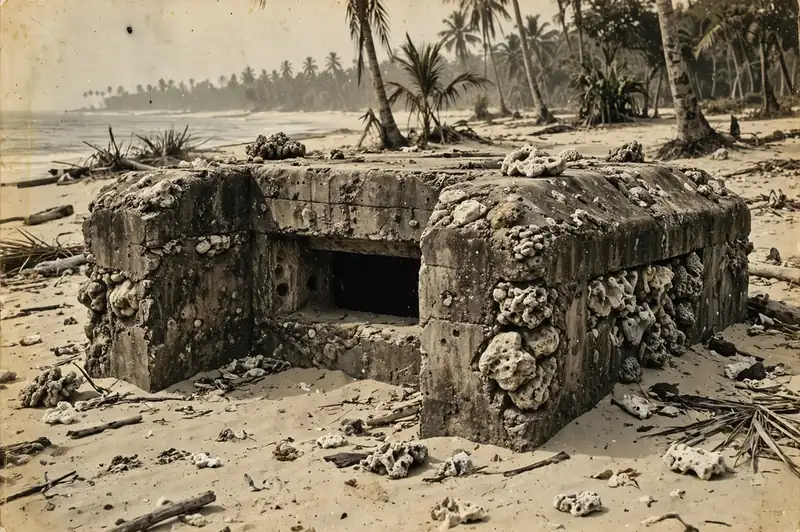
The Japanese defences on Betio were the strongest the Americans had yet faced in the Pacific. The garrison commander, Rear Admiral Keiji Shibasaki, had spent a year turning the island into a fortress. The defences included more than 500 pillboxes and bunkers, many of them built of concrete and coral, with walls more than a metre thick. The island was ringed with anti-boat guns, machine guns and mines, and the beaches were covered by interlocking fields of fire. The airfield, in the centre of the island, was protected by a line of bunkers, and the command post was buried deep underground. The Japanese had also built a seawall of logs and coral around the island, and they had placed obstacles — tetrahedrons, barbed wire and mines — in the water. Shibasaki’s boast, that a million men could not take the island in a hundred years, was not idle talk: the defences were real, and they were designed to kill an attacker on the beaches.
The Tide and the Reef
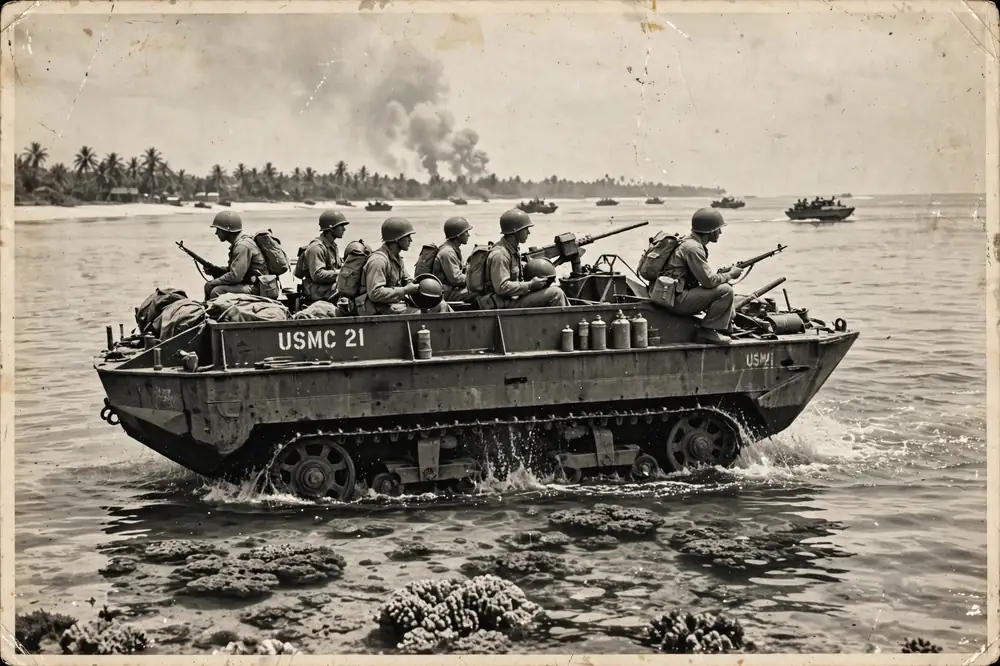
The most dangerous feature of Betio was not the bunkers but the reef. The island is surrounded by a coral reef, and at low tide the water over the reef is only about 1 metre deep — too shallow for a landing craft to cross. The Americans knew about the reef, and they knew the tide would be low on the morning of 20 November, but they believed the landing craft could cross it anyway, or that the tide would rise in time. The planners had a new vehicle, the LVT — the Landing Vehicle, Tracked, an amphibious tractor that could crawl over a reef — but they had too few of them: only about 125 LVTs for the whole landing force, and many of them were old and unreliable. The rest of the force would land in ordinary landing craft, which would ground on the reef and leave the men to wade ashore. The tide, the reef and the shortage of LVTs were the three facts that decided the first day of the battle, and they were all known before the landing began.
3. Opposing Forces
The 2nd Marine Division
The American landing force was the 2nd Marine Division, under Major General Julian C. Smith, a division that had fought at Guadalcanal and was one of the most experienced formations in the Marine Corps. The division’s landing force numbered about 18,000 men, organised into three regiments: the 2nd Marines, the 6th Marines and the 8th Marines, with the 2nd and 8th Regiments in the first wave and the 6th in reserve. The Marines were supported by a naval task force under Rear Admiral Harry Hill, which included battleships, cruisers and destroyers, and by the aircraft of the Fifth Fleet under Admiral Raymond Spruance. The plan called for a naval bombardment of the island before the landings, lasting about three hours, and for the Marines to land on the lagoon side of the island, where the water was calmer and the beaches were less strongly defended.
The LVTs and the Landing Craft
The landing force’s most important equipment was the LVT, the amphibious tractor that could cross the reef. The LVT was a tracked vehicle with a boat-like hull, designed to carry men from the transports to the beach, over reefs and through shallow water. The Marines had about 125 LVTs for the landing, and they were the only vehicles that could reach the beach at low tide. The rest of the force would land in LCVPs — the Higgins boats — which would ground on the reef and leave the men to wade. The shortage of LVTs was the most serious problem of the landing: there were not enough of them to carry the first wave, let alone the follow-on waves, and many of the LVTs that did land were destroyed on the beaches. The Marines who waded ashore from the reef did so because there were not enough LVTs to carry them, and the men who died in the water died, in large part, because of that shortage.
The Japanese Garrison
The Japanese garrison on Betio numbered about 4,800 men, of whom about 2,600 were Japanese soldiers of the 3rd Special Base Force and the 7th Sasebo Special Naval Landing Force, and about 1,200 were Korean labourers, with about 1,000 naval troops and construction workers making up the remainder. The garrison was commanded by Rear Admiral Keiji Shibasaki, a capable officer who had spent a year fortifying the island. The Japanese plan was simple: to kill the Americans on the beaches. The defences were designed to survive the naval bombardment and to open fire when the landing craft reached the reef, and the Japanese soldiers were ordered to fight to the death. There was no plan for retreat and no plan for surrender: the garrison was expected to die where it stood, and almost all of it did.
Shibasaki and His Men
Shibasaki was a veteran naval officer who had served in China and in the Pacific, and he was respected by his men. He had turned Betio into a fortress, and he believed — as he told his officers — that the island could not be taken. His men were well trained, well supplied and determined: they had food, water and ammunition for months, and they had prepared positions that could survive a bombardment. The Korean labourers, who had been brought to the island to build the defences, were less willing to fight, and many of them surrendered or were killed in the bombardment. The Japanese soldiers, by contrast, fought to the death, and only 17 of them were taken prisoner. Shibasaki himself was killed on the second day of the battle, probably by naval gunfire, and his death did not change the course of the fighting: his men fought on, position by position, until they were all dead.
| United States | Japan | |
|---|---|---|
| Infantry | 2nd Marine Division (2nd, 6th, 8th Regiments) | 3rd Special Base Force; 7th Sasebo Special Naval Landing Force |
| Labourers | — | About 1,200 Korean labourers |
| Tanks | Light tanks (M3 Stuart) landed after the first day | A few light tanks and armoured cars |
| Artillery | Naval gunfire: battleships, cruisers, destroyers | Coastal guns, anti-boat guns, mortars |
| Air support | Fifth Fleet carrier aircraft | None over Betio |
| Landing craft | About 125 LVT amphibious tractors; LCVP Higgins boats | — |
4. The Battle
The Bombardment
The battle began before dawn on 20 November 1943, with a naval bombardment that was the heaviest of the Pacific War to that point. Battleships, cruisers and destroyers fired on Betio for about three hours, and carrier aircraft bombed and strafed the island. The bombardment was impressive to watch, and it was believed to have destroyed the defences. It had not. The Japanese bunkers, built of concrete and coral with walls more than a metre thick, survived the shelling, and the Japanese soldiers, sheltered underground, waited for it to end. The bombardment did destroy some positions and kill some men, but it did not destroy the defences, and it did not silence the guns. The Marines who landed a few hours later would discover that the island was still a fortress, and that the bombardment had been too short and too light for the task.
Three Hours Was Not Enough
The bombardment’s failure was a matter of time and of intelligence. Three hours of shelling was not enough to destroy concrete bunkers, and the Americans did not know how strong the bunkers were. The naval guns fired at targets they could see, but many of the Japanese positions were hidden, buried or camouflaged, and the shells that hit them did not penetrate. The aircraft, bombing from above, could not see the bunkers either, and their bombs fell on the sand and the palm trees. The lesson, which the Americans learned at Tarawa and applied at every island after it, was that a fortified island needed days of bombardment, not hours, and that the bombardment had to be aimed by observers who could see the targets. At Tarawa, the bombardment was a spectacle that changed nothing, and the Marines paid for it on the beaches. The bombardment of Tarawa was the most spectacular of the Pacific war to that point, and it was also the most useless, because the shells that were meant to destroy the Japanese defences fell on ground the Japanese had already abandoned for their bunkers.
The First Wave
The first wave landed at about 09:00 on 20 November, and it was a disaster. The landing craft carrying the Marines grounded on the coral reef, about 500 metres from the beach, because the tide was low and the water over the reef was too shallow. The LVTs, which could cross the reef, carried the first men ashore, but there were not enough of them, and the rest of the Marines had to wade. The men waded through chest-deep water, in the open, under the fire of Japanese machine guns that had survived the bombardment. The water was red, the men fell in rows, and the beach, when they reached it, was a narrow strip of sand backed by a seawall of logs, behind which the Japanese waited. The first wave reached the beach with heavy losses, and the men who got ashore took cover behind the seawall and waited for the next wave, which was also wading in under fire.
Wading Ashore Under Fire
The wade ashore is the image of Tarawa that has stayed in the American memory, and it was as bad as the photographs suggest. The men were in the water for twenty minutes or more, carrying 30 kilograms of equipment, while machine guns fired at them from bunkers they could not see. The LVTs that had carried the first men were destroyed on the beaches, and the follow-on waves had no way to cross the reef except on foot. The officers who led the wade — many of them lieutenants and sergeants — were killed in large numbers, and the units that reached the beach were mixed together, without officers, without radios and without orders. The Marines who survived the wade took cover behind the seawall, and there they stayed, pinned down, for the rest of the first day, while the Japanese fired at them from the bunkers and the American naval guns fired over their heads at targets they could not see.
The Fight for the Airfield
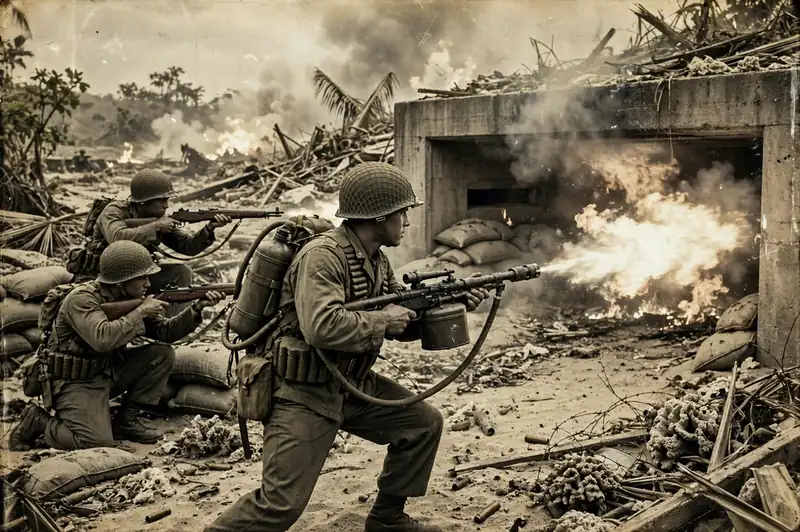
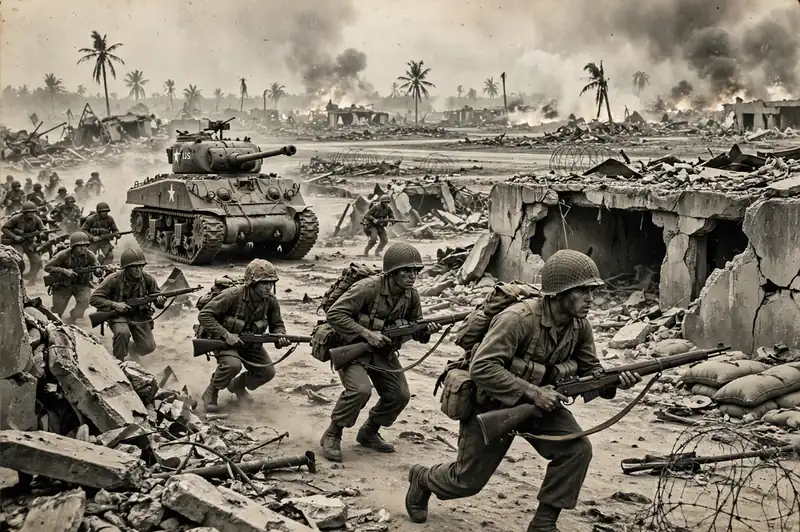
On the second day, 21 November, the Marines began to move. The 6th Marines, the reserve regiment, landed and joined the fight, and the Marines on the beach, reinforced and reorganised, began to push inland. The fighting was slow and costly: the Japanese positions had to be taken one by one, with grenades, satchel charges and flamethrowers, and each bunker cost lives. The airfield, in the centre of the island, was the main objective, and it was taken on the second day, though the fighting around it went on for another day. The Marines used a new weapon, the flamethrower, and a new tactic, the coordinated attack by infantry, tanks and engineers, to reduce the bunkers. The tanks — light M3 Stuarts that had been landed on the second day — were used to blast the bunkers at close range, while the engineers blew them up with explosives. By the end of the second day, the Marines held the airfield and the western half of the island, and the Japanese were confined to the eastern end.
Bunker by Bunker
The fighting on Betio was a war of bunkers, and it was fought at a range of metres. The Japanese bunkers were built to survive a bombardment, and they could only be taken by men who got close enough to throw a grenade into the firing slit or to place a charge against the wall. The Marines learned to do it in teams: one man fired at the slit to keep the Japanese down, another crawled forward with a charge, and a third covered him with a rifle. The flamethrower teams were the most effective and the most vulnerable: a man with a flamethrower could burn out a bunker in seconds, but he was a target for every Japanese rifleman on the island, and the flamethrower operators died in large numbers. The bunker fighting went on for three days, and it was the bloodiest close-quarters fighting of the Pacific War to that point. When the last bunker fell, on 23 November, the island was in American hands, and the cost was written on the beaches.
5. Turning Point
The LVTs Reach the Beach
The turning point of the battle was not a single charge but the arrival of the means to fight it: the LVTs. On the first day, the Marines who reached the beach did so in the LVTs, and the men who waded ashore did so because there were not enough LVTs to carry them. On the second day, more LVTs landed, and they were used not only to carry men but to carry ammunition, water and medical supplies to the beach, and to evacuate the wounded. The LVTs also carried the tanks ashore, and the tanks, once they were on the island, changed the battle: they could blast the bunkers at close range, and they could support the infantry in the attacks on the airfield. The battle turned when the Marines had the vehicles to move, to supply themselves and to fight with armour, and that turning point came on the second day, when the 6th Marines landed and the tanks came ashore.
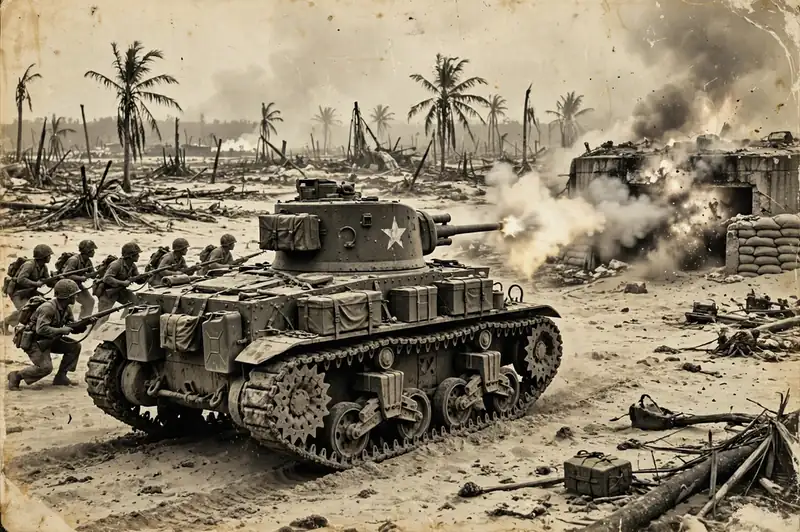
The Tanks Come Ashore
The tanks that came ashore on the second day were light M3 Stuarts, and they were not ideal for the task: their guns were small, their armour was thin, and they were vulnerable to Japanese anti-tank guns. But they were better than nothing, and they were used with skill. The tank crews learned to work with the infantry: the tanks would fire at a bunker to keep the Japanese down, the infantry would crawl forward with charges, and the engineers would blow the bunker up. The tanks also gave the Marines something they had lacked on the first day: the ability to move under fire. A Marine on foot, in the open, was a target; a Marine behind a tank had cover, and the tanks became mobile shields for the infantry. The tanks lost heavily — many of them were destroyed by Japanese anti-tank guns — but they bought the infantry the time and the cover it needed to take the airfield.
The Death of Shibasaki
The second turning point was the death of the Japanese commander, Rear Admiral Keiji Shibasaki, on the second day of the battle. Shibasaki was killed, probably by naval gunfire, while moving between his command post and the front line, and his death removed the one man who could have coordinated the Japanese defence. The Japanese fought on — they were ordered to fight to the death, and they did — but without Shibasaki they fought as isolated groups, each bunker fighting its own battle, without coordination and without a plan. The Marines, who were learning to fight as a coordinated force, with infantry, tanks and engineers working together, had the advantage of organisation, and the advantage grew as the battle went on. Shibasaki’s death did not end the battle, but it ended the Japanese defence as a coherent whole, and the rest of the fighting was a matter of reducing the bunkers one by one.
A Defence Without a Commander
The Japanese defence after Shibasaki’s death is a study in the limits of courage without command. The Japanese soldiers fought with extraordinary bravery, and they killed many Marines, but they fought without coordination, without communication and without a plan for the battle as a whole. The bunkers that held out the longest were the ones that were hardest to reach, not the ones that were best commanded, and the Marines were able to take them one by one because there was no one to reinforce them or to organise a counterattack. The Japanese plan had been to kill the Americans on the beaches, and when that failed, there was no second plan. The garrison died where it stood, as it had been ordered to do, and the battle became a siege of bunkers, fought to the last man. Shibasaki’s death left the garrison without a commander at the moment it needed one most, and the Japanese, who had been trained to fight to the death, fought to the death without orders, bunker by bunker, until there were none left.
6. Casualties and Losses
American Losses
The American losses at Tarawa were about 1,000 men killed and more than 2,000 wounded, out of about 18,000 Marines engaged. The most commonly cited figures are 1,009 killed and 2,101 wounded, for a total of about 3,110 casualties, though the exact numbers vary slightly between sources. The losses fell hardest on the first waves: the 2nd Marines, which landed first, lost more than half its officers in the first day, and the battalions that waded ashore from the reef lost men in numbers that had not been seen in the Marine Corps since the First World War. The casualty rate — about 17 per cent of the force engaged — was the highest the Marines had suffered in a single battle in the Pacific War to that point, and it was the reason Tarawa became a byword for a costly victory.
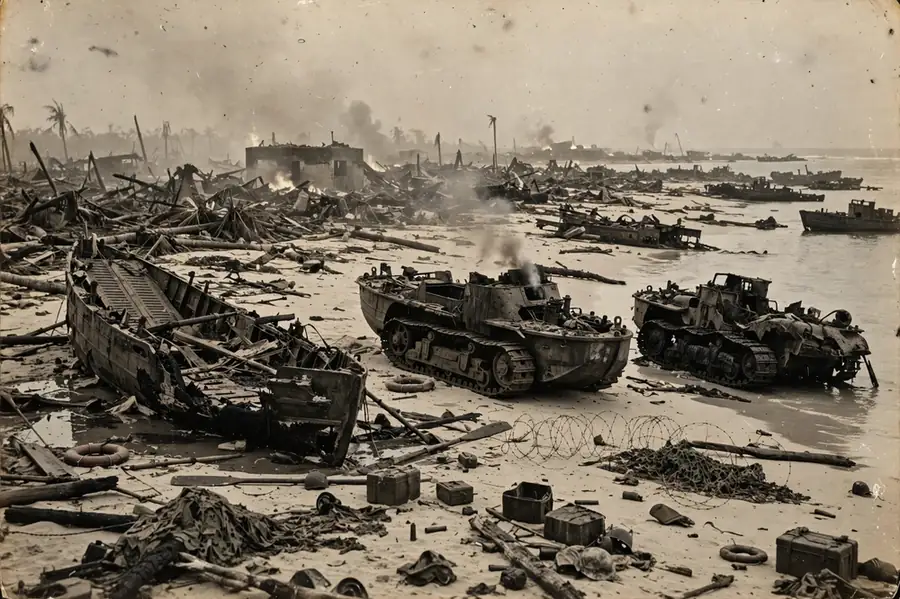
The First Day Was the Worst
The first day of the battle accounted for the majority of the American losses, and the reason was the wade ashore. The men who waded from the reef to the beach were exposed for twenty minutes or more, in the open, under the fire of machine guns that the bombardment had failed to silence. The officers who led the wade were killed in disproportionate numbers, and the units that reached the beach were leaderless and disorganised. The second and third days, when the Marines fought with tanks, flamethrowers and artillery support, were still costly, but the losses were lower, and the Marines were no longer being killed in the water. The first day at Tarawa was the bloodiest day of the Pacific War for the Marine Corps to that point, and it was the day that taught the Americans the most. The Marines who survived the first day at Tarawa never forgot it, and the battle became the measure by which every amphibious assault of the Pacific war was judged afterwards.
Japanese Losses
The Japanese losses at Tarawa were almost total. Of the garrison of about 4,800 men, about 4,690 were killed — a figure that includes the Korean labourers and the naval troops — and only 17 Japanese soldiers were taken prisoner, along with 129 Korean labourers. The Japanese fought to the death, as they had been ordered to do, and the battle ended only when the last bunker fell and the last defenders were killed. The scale of the Japanese losses was a shock to the American public, which had not yet understood that the Japanese would not surrender, and it was a warning of what the rest of the Pacific War would cost. At Tarawa, the Americans learned that the Japanese would fight to the last man, and that every island would have to be taken at the price of a battle of annihilation.
The Price of No Surrender
The Japanese refusal to surrender shaped the whole Pacific War, and Tarawa was the first place the Americans saw it in full. The Japanese soldiers on Betio did not surrender when their positions were overrun, they did not surrender when their commander was killed, and they did not surrender when they were the last men alive on the island. They fought until they were killed, and the Marines had to kill them, bunker by bunker, with grenades, flamethrowers and explosives. The cost of this refusal was paid by both sides: the Japanese died to the last man, and the Marines died in numbers that would have been unthinkable if the Japanese had surrendered. The lesson was learned, and it was applied — grimly — at every island after Tarawa, where the Americans planned for battles of annihilation and the Japanese provided them. The Japanese at Tarawa did not surrender, and the Americans learned that they would not surrender anywhere, and the price of that lesson was paid in blood on every island that followed.
| United States | Japan | |
|---|---|---|
| Killed | About 1,009 | About 4,690 |
| Wounded | About 2,101 | — |
| Total | About 3,110 | About 4,690 killed; 17 prisoners |
| Casualty rate | About 17% of the force engaged | Almost total |
7. Map and Geography
The Atoll of Tarawa
Tarawa Atoll is a chain of low coral islands in the Gilbert Islands, in the central Pacific, about halfway between Hawaii and the Marshall Islands. The atoll is a thin ring of land around a lagoon, and its main island, Betio, is a flat spit of coral sand less than 3 kilometres long and less than 800 metres wide. The island is so low that it rises only a few metres above the sea, and it is so small that the battle for it was fought within sight of the sea on every side. The airfield, in the centre of the island, was the reason the Americans wanted it: from Betio, American bombers could support the next operation, the invasion of the Marshall Islands, and the island was a stepping stone on the road to Japan. The atoll’s geography — a small, flat island in the middle of a vast ocean — made it both a valuable prize and a death trap.
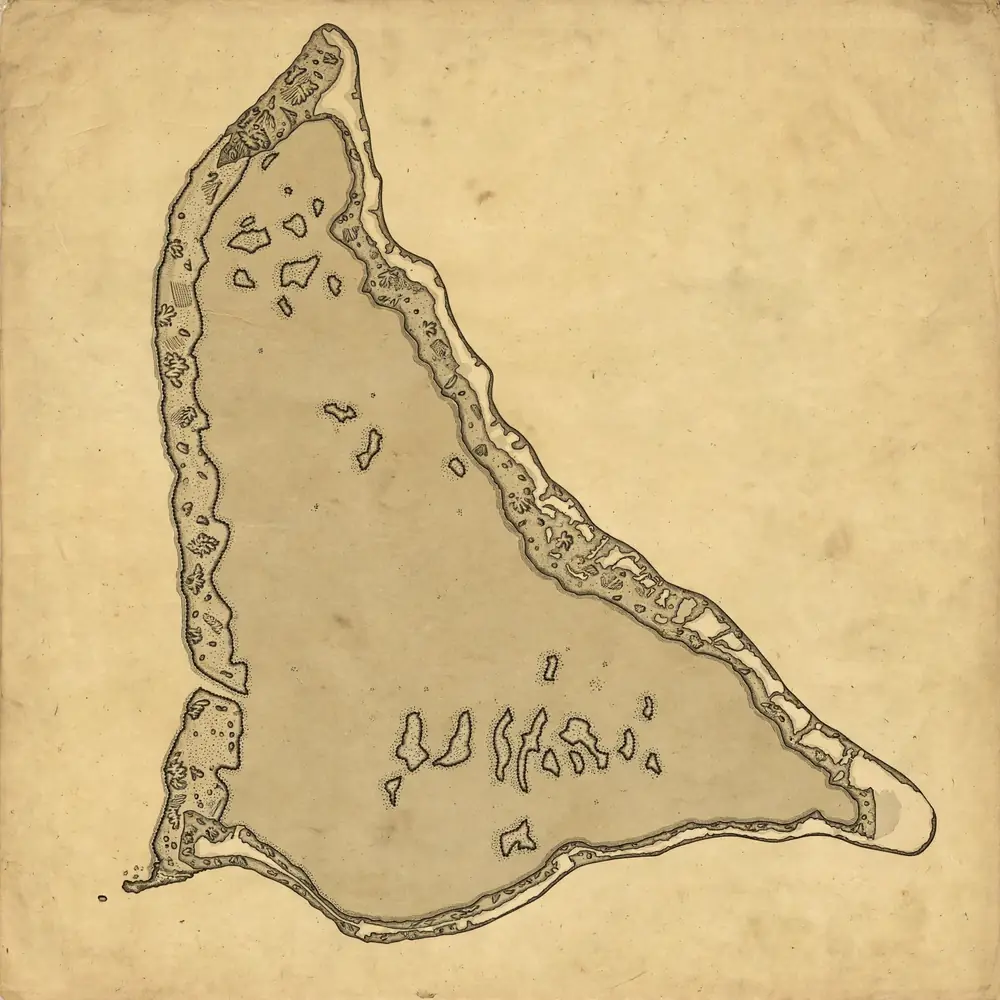
Betio: Less Than Three Kilometres Long
Betio’s small size was the defining feature of the battle. The island is so small that the Marines who landed on it could see the whole island from the beach, and the Japanese who defended it could fire on every part of it from their bunkers. There was no room to manoeuvre, no high ground to take, and no place to hide: the battle was fought on a flat strip of sand, in the open, at close range. The island’s small size also meant that the naval bombardment, however heavy, could not miss, and that the Japanese defences, however strong, could not be outflanked. The battle for Betio was a frontal assault on a fortress, and the fortress was the whole island. The Marines took it in 76 hours, and they took it by walking across it, bunker by bunker, from one end to the other. Betio was less than three kilometres long, and the Marines took it in seventy-six hours, and the battle for it became the symbol of what the Pacific war would cost, and of what the Marine Corps could endure.
The Reef and the Lagoon
The reef around Betio was the battle’s most important geographical feature, and it was the reason the first day was so bloody. The reef is a shelf of coral, about 500 metres wide, that surrounds the island, and at low tide the water over it is only about 1 metre deep. The Americans landed on the lagoon side of the island, where the water was calmer, but the reef was still there, and the landing craft grounded on it. The lagoon itself, on the northern side of the island, is a shallow body of water, protected from the ocean swell, and it was the reason the Americans chose to land there rather than on the ocean side, where the surf was heavier. The reef and the lagoon shaped the battle: the reef stopped the landing craft, the lagoon gave the Americans a sheltered approach, and the combination of the two meant that the Marines had to wade ashore under fire. The geography of Betio was a trap, and the Americans walked into it.
The Tide That Decided the Battle
The tide on 20 November 1943 was the single fact that decided the first day of the battle, and it was a fact the Americans knew about and misjudged. The tide was low — a neap tide, the lowest of the month — and the water over the reef was too shallow for the landing craft. The planners had believed the tide would rise in time, or that the landing craft could cross the reef anyway, and they were wrong on both counts. The LVTs, which could cross the reef, were too few, and the men who waded ashore paid for the misjudgement with their lives. The tide at Tarawa became a lesson that the Americans never forgot: at every island after Tarawa, the planners checked the tides, counted the LVTs, and made sure the landing force could reach the beach. The tide, which had been a footnote in the plan, became the most important fact of the battle.
8. Outcome and Legacy of the Battle of Tarawa
The Airfield and the Next Step
The capture of Betio gave the Americans what they had come for: an airfield. Within days of the battle’s end, American engineers were repairing the airfield, and within weeks American bombers were flying from Betio in support of the next operation, the invasion of the Marshall Islands in January 1944. The airfield, which the Japanese had built and the Americans had taken at such a cost, became a base for the bombers that would strike the Marshalls, and then the Marianas, and then Japan itself. Tarawa was the first step on the road across the Pacific, and the road led, in the end, to Tokyo. The island itself, after the battle, was a ruin: the palm trees were gone, the bunkers were shattered, and the beaches were covered with the wreckage of landing craft and the bodies of the dead. The Americans buried their dead, repaired the airfield, and moved on.
The Road to the Marshalls
The invasion of the Marshall Islands, in January and February 1944, was the direct sequel to Tarawa, and it showed what the Americans had learned. The bombardment of Kwajalein, the main island of the Marshalls, lasted for days, not hours, and the landing force had enough LVTs to carry the men ashore. The battle for Kwajalein was still costly, but it was not the bloodbath that Tarawa had been, and the Americans took the island in a week. The lessons of Tarawa — the long bombardment, the LVTs, the tanks, the flamethrowers, the coordinated attack — were applied at Kwajalein, and they were applied again at Saipan, at Guam, at Peleliu, at Iwo Jima and at Okinawa. Each of those battles was costly, and some were costlier than Tarawa, but none of them repeated Tarawa’s particular horror: the wade ashore under fire, from a reef that the landing craft could not cross.
The Shock at Home
The most immediate legacy of Tarawa was the shock it caused in the United States. The photographs of dead Marines on the beaches of Betio, and the newsreel footage of the wade ashore, were published in American newspapers and shown in cinemas, and the public was horrified. The casualty figures — about 1,000 dead in 76 hours, for an island most Americans had never heard of — raised the question of whether the island-hopping strategy was worth its cost, and the question was debated in Congress and in the press. The Marine Corps defended the battle, and the Navy pointed out that the lessons learned at Tarawa had saved lives at every island after it. The debate did not end the island-hopping strategy, but it changed the way the war was reported: after Tarawa, the American public understood that the Pacific War would be long, bloody and expensive, and that the road to Tokyo would be measured in lives.
Tarawa in Memory
Tarawa is remembered in the Marine Corps as the battle that made the Corps what it is, and its memory is kept alive in a way few battles are. The phrase “Tarawa” is still used in the Marine Corps to mean a hard, costly fight, and the men who fought there are remembered as the generation that taught the Corps how to take a fortified island. The island itself is quiet now: the airfield is still there, the bunkers are still there, and the beaches are still covered with the rusting wreckage of the landing craft. The dead — American and Japanese — are buried on the island, and the memorials there are simple: a monument to the Marines, and a monument to the Japanese, standing a few hundred metres apart on an island less than 3 kilometres long. Tarawa’s legacy is a simple one, and it is written in the casualty figures: a thousand Americans dead, for a speck of coral in the middle of nowhere, and a lesson that saved thousands of lives afterwards.
9. Commanders
The American Commanders
Major General Julian C. Smith (United States). Commander of the 2nd Marine Division at Tarawa. Smith was a veteran of the First World War and of the fighting at Guadalcanal, and he commanded the division through the bloodiest battle of its history. He later commanded the division in the Marshall Islands and served in senior positions in the Marine Corps. He retired as a lieutenant general and died in 1975. Smith’s leadership at Tarawa — calm, determined and willing to accept the cost — is remembered as a model of command under fire.
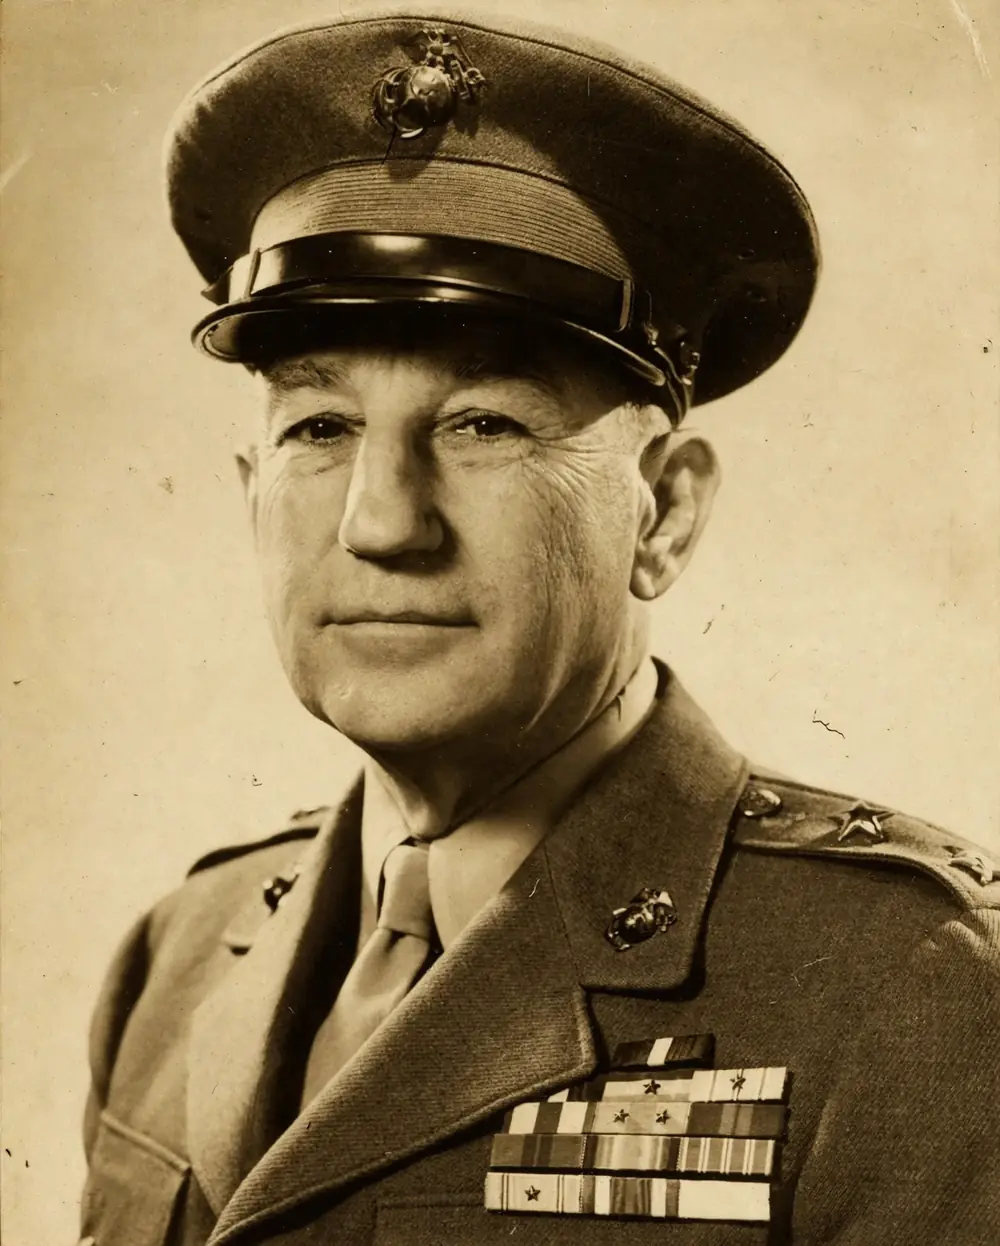
Rear Admiral Harry Hill (United States). Commander of the naval task force that carried the Marines to Tarawa and supported the landings. Hill was responsible for the bombardment and for the landing plan, and he was criticised afterwards for the short bombardment and the shortage of LVTs. He defended his decisions, pointing out that the intelligence had underestimated the defences and that the tide had been worse than expected. He went on to command naval forces in the Marshall Islands and the Marianas.
Admiral Raymond Spruance (United States). Commander of the Fifth Fleet and the overall commander of Operation Galvanic. Spruance was one of the most capable admirals of the Pacific War — the victor of Midway — and he directed the Gilberts operation from his flagship. He later commanded the Fifth Fleet at the Battle of the Philippine Sea and at Iwo Jima and Okinawa, and he is remembered as the finest naval commander the United States produced in the war.
Julian Smith: Command Under Fire
Smith’s command at Tarawa was a study in steadiness under pressure. On the first day, when the reports from the beaches were confused and the casualties were mounting, he did not panic and he did not order a withdrawal. He sent in the reserve regiment, he called for more naval gunfire, and he kept the landing going, even when the beach was a killing ground. His most important decision was to commit the 6th Marines on the second day, when the battle was still in doubt, and to push the attack on the airfield. Smith’s calm, and his willingness to accept the cost of the battle, were the qualities that carried the division through the worst day in its history. After the war, the Marines who had fought at Tarawa remembered Smith as the general who had been with them, in the sense that mattered: he had not flinched, and neither had they.
The Japanese Commander
Rear Admiral Keiji Shibasaki (Japan). Commander of the Japanese garrison on Betio. Shibasaki was a capable naval officer who had spent a year fortifying the island, and he believed it could not be taken. He was killed on the second day of the battle, probably by naval gunfire, while moving between his command post and the front line. His death removed the one man who could have coordinated the defence, but it did not change the course of the battle: his men fought on, position by position, until they were all dead. Shibasaki’s boast — that a million men could not take Betio in a hundred years — is remembered as one of the great misjudgements of the Pacific War, and his defence of the island, however futile, is remembered as one of the most determined of the war.
Shibasaki’s Fortress
Shibasaki’s fortification of Betio was a remarkable achievement, and it deserves to be understood on its own terms. In a year, with limited materials and a workforce of soldiers and Korean labourers, he built more than 500 bunkers and pillboxes, ringed the island with guns and mines, and created a defence that survived the heaviest naval bombardment of the war to that point. The defences were not perfect — they could not survive a longer bombardment, and they could not stop the Marines once the tanks came ashore — but they were far stronger than the Americans had expected, and they killed a thousand Marines. Shibasaki’s fortress was a testament to Japanese engineering and to Japanese determination, and it was also a testament to the limits of a fortress: no matter how strong the walls, a determined attacker with enough men and enough firepower will take it, and the price will be paid in lives on both sides.
Frequently Asked Questions
When was the Battle of Tarawa?
From 20 to 23 November 1943 — 76 hours of fighting on the island of Betio, in Tarawa Atoll, in the Gilbert Islands.
How many Americans died at Tarawa?
About 1,000 Marines were killed and more than 2,000 wounded, for a total of about 3,110 casualties out of about 18,000 men engaged. The most commonly cited figures are 1,009 killed and 2,101 wounded.
Why was Tarawa so bloody?
Because the naval bombardment was too short to destroy the Japanese bunkers, because the tide was low and the landing craft grounded on the coral reef, forcing the Marines to wade ashore under fire, and because there were too few LVT amphibious tractors to carry them across the reef.
What is an LVT?
The Landing Vehicle, Tracked — an amphibious tractor with a boat-like hull and tracks, designed to carry men from the transports to the beach over reefs and through shallow water. At Tarawa there were only about 125 LVTs, and they were the only vehicles that could reach the beach at low tide.
Did the Japanese surrender at Tarawa?
Almost none of them. Of the garrison of about 4,800 men, about 4,690 were killed and only 17 Japanese soldiers were taken prisoner, along with 129 Korean labourers. The Japanese fought to the death, as they had been ordered to do.
Was Tarawa worth it?
The airfield on Betio supported the invasion of the Marshall Islands, and the lessons learned at Tarawa — the long bombardment, the LVTs, the tanks and the coordinated attack — saved lives at every island after it. The question was fiercely debated in the United States at the time, and it is still debated today.
Sources
- Wikipedia, “Battle of Tarawa” — dates, strength, casualty figures (1,009 killed, 2,101 wounded; about 4,690 Japanese killed), commanders and the course of the battle.
- US Marine Corps History Division, The Battle for Tarawa — official history, the landings, the reef and the wade ashore.
- Encyclopædia Britannica, “Battle of Tarawa” — background, the battle and its cost.
- Robert Sherrod, Tarawa: The Story of a Battle (Duell, Sloan and Pearce, 1944) — the classic first-hand account by a war correspondent who was there.
- Samuel Eliot Morison, History of United States Naval Operations in World War II, Vol. VII — the naval operations, the bombardment and the landings.
- Joseph H. Alexander, Utmost Savagery: The Three Days of Tarawa (Naval Institute Press, 1995) — the most detailed modern history of the battle.
Further reading
- James R. Stockman, The Battle for Tarawa (US Marine Corps, 1947).
- Derrick Wright, Tarawa 1943: The Turning of the Tide (Osprey, 2000).