 WAR ATLAS MILITARY HISTORY MAGAZINE · WWI — WWII
Mitsubishi A6M Zero
1. Mitsubishi A6M Zero — At a Glance
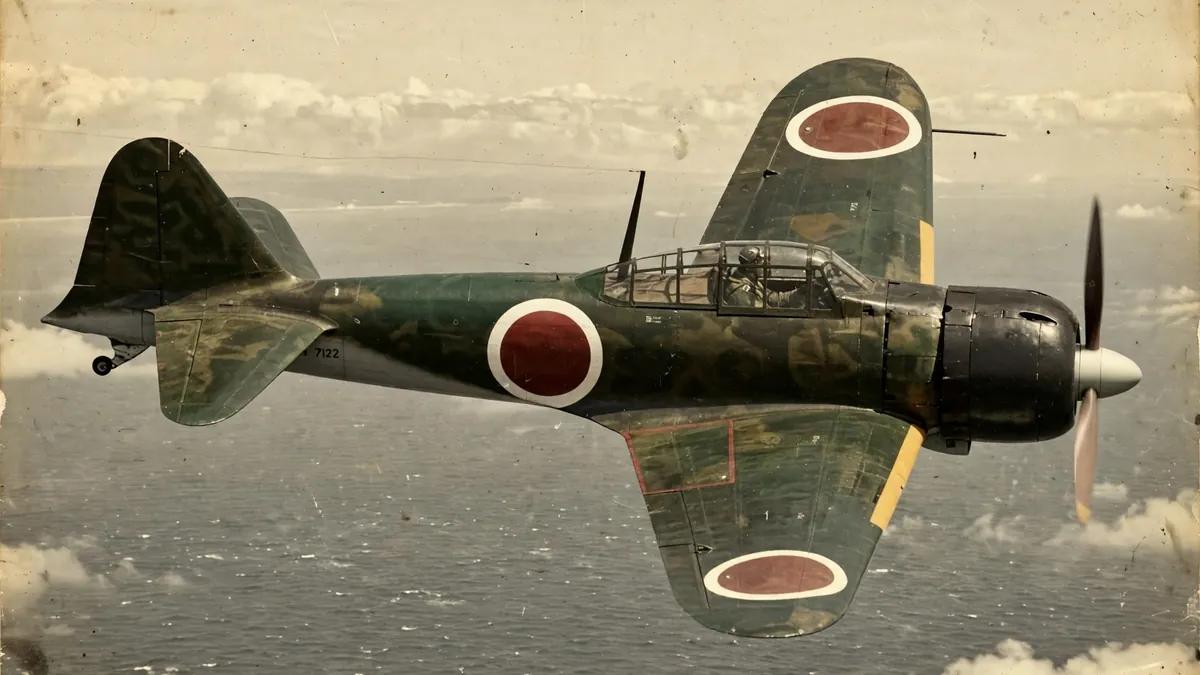
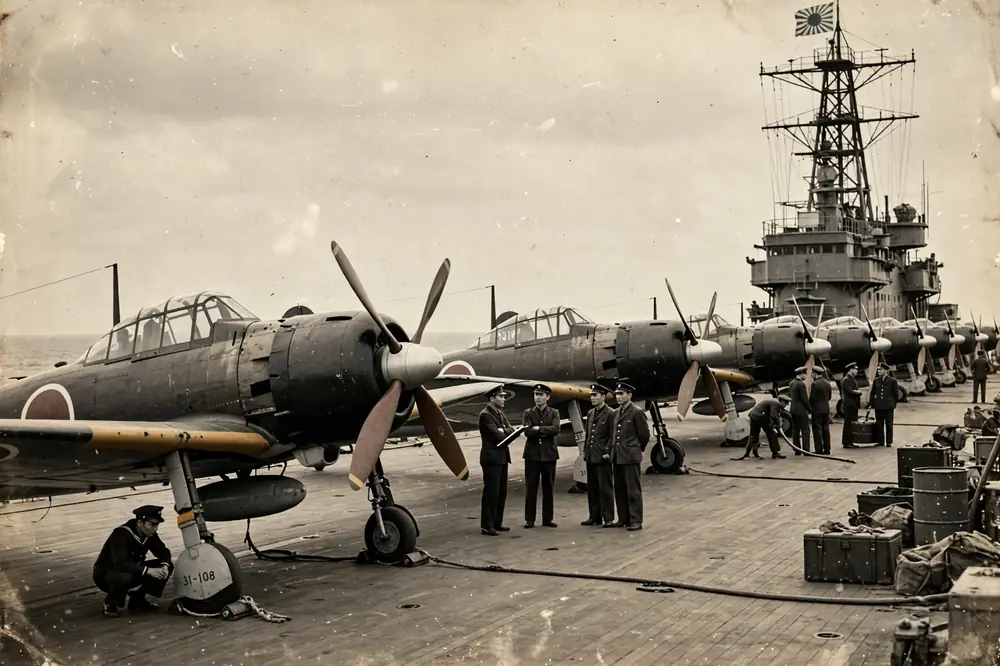
The Mitsubishi A6M Zero was the Imperial Japanese Navy’s principal carrier fighter of the Second World War, and one of the most famous aircraft of the conflict. Designed by Jiro Horikoshi and his team at Mitsubishi, the Zero combined extraordinary manoeuvrability, a very long range and a powerful armament in a light, elegant airframe, and in 1941 and 1942 it outclassed every fighter the Allies could put against it in the Pacific. At Pearl Harbor, over the Philippines, Malaya and the Dutch East Indies, and in the long air war over New Guinea and the Solomon Islands, the Zero gave Japan air superiority in the first year of the Pacific War. Its weaknesses — the absence of armour protection for the pilot and of self-sealing fuel tanks, and an engine that could not be developed to match the power of later Allied fighters — became clear after the Battle of Midway in June 1942 and the capture of an intact Zero in Alaska, and by 1943 the newer American fighters, the Grumman F6F Hellcat and the Vought F4U Corsair, had taken the advantage. About 10,939 Zeros were built, more than any other Japanese aircraft of the war, and the type remained in front-line service until the end of the war in August 1945, in the last months often flown on kamikaze missions.
The Zero’s fame rests on a paradox. It was built to a specification that demanded the impossible — a carrier fighter with the range of a bomber, the manoeuvrability of a biplane and the firepower of a heavy fighter — and Horikoshi achieved it by making the aircraft as light as possible, using a new aluminium alloy, dispensing with armour and self-sealing tanks, and fitting a large, efficient wing. The result was an aircraft that could turn inside any opponent, climb quickly and fly more than 3,000 kilometres with a drop tank, but that caught fire easily when hit and that could not dive as fast as its American rivals without its controls stiffening. Allied pilots learned to respect the Zero and to avoid turning with it, and to use their speed, their diving ability and their rugged construction instead. The story of the Zero is therefore the story of the whole Pacific air war: a brilliant opening advantage, slowly eroded by industrial weight, by the loss of trained pilots and by aircraft that were designed to exploit the Zero’s weaknesses.
2. Key Facts
| Type | Carrier-based fighter |
| Origin | Japan |
| Designer | Jiro Horikoshi, Mitsubishi Heavy Industries |
| Manufacturer | Mitsubishi Heavy Industries; Nakajima Aircraft Company |
| First flight | 1 April 1939 |
| In service | 1940–1945 |
| Produced | 1940–1945; about 10,939 built |
| Crew | 1 |
| Length | 9.06 m (A6M2) |
| Wingspan | 12.0 m (A6M2) |
| Height | 3.05 m |
| Empty weight | About 1,680 kg (A6M2) |
| Maximum take-off weight | About 2,796 kg (A6M2) |
| Engine | Nakajima Sakae 12 radial, 940 hp (A6M2); Sakae 21, 1,130 hp (A6M5) |
| Maximum speed | About 533 km/h at 4,550 m (A6M2); about 565 km/h (A6M5) |
| Range | About 1,870 km on internal fuel; about 3,100 km with drop tank (A6M2) |
| Service ceiling | About 10,000 m |
| Armament | Two 20 mm Type 99 cannon in the wings; two 7.7 mm Type 97 machine guns in the nose; up to two 60 kg bombs (later variants) |
3. Background and Development
The 12-shi Specification
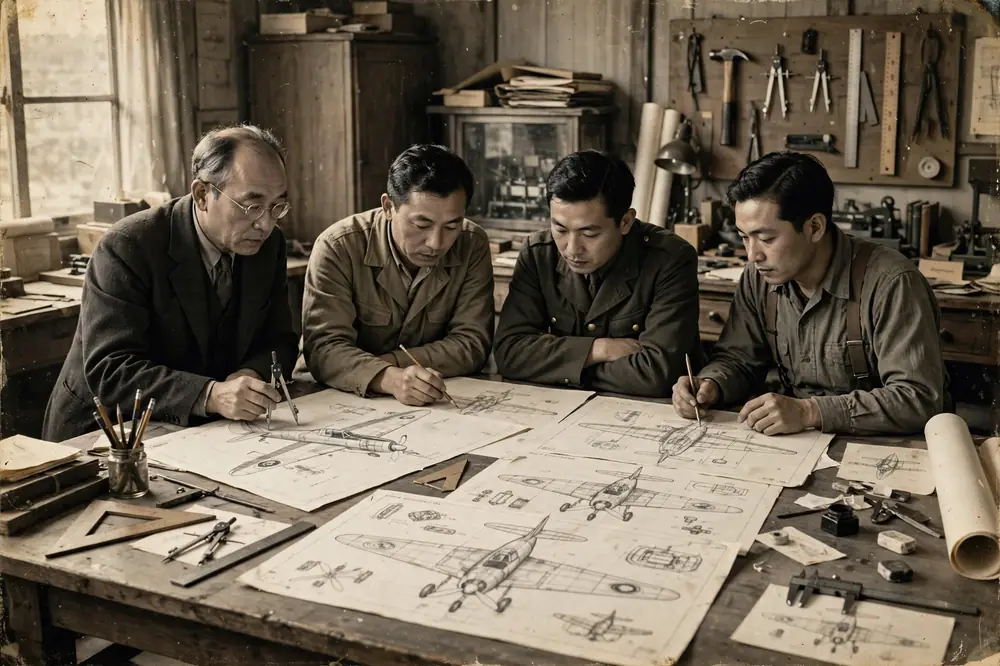
In 1937 the Imperial Japanese Navy issued a specification for a new carrier fighter to replace the Mitsubishi A5M, the world’s first carrier monoplane fighter. The requirements, known as the 12-shi specification, were extraordinarily demanding: the new fighter had to be as manoeuvrable as the A5M, faster than 500 km/h, able to climb to 3,000 metres in less than three and a half minutes, armed with two 20 mm cannon and two machine guns, and able to fly for six to eight hours at cruising speed — a range of more than 3,000 kilometres with a drop tank. No navy in the world had asked for a fighter with such range, because the Japanese Navy planned to use its carriers to strike over the vast distances of the Pacific, and its fighters had to escort bombers to targets far from the carriers and return. Mitsubishi’s chief designer, Jiro Horikoshi, and Nakajima both submitted proposals; Nakajima judged the specification impossible and withdrew, leaving Mitsubishi to build the aircraft alone.
Horikoshi’s Lightweight Solution
Horikoshi’s answer to the 12-shi specification was lightness, pursued further than any other fighter designer of the time had dared, and this section explains how that choice was made and what it cost. The first part describes the weight-saving design itself: the simple, clean airframe, the deliberate omission of armour plate, bulletproof glass and self-sealing fuel tanks, and the decision to spend every kilogram saved on fuel and on the large wing that gave the Zero its lift and its tight turning circle. It follows the first prototype, flown on 1 April 1939 with the 780-horsepower Mitsubishi Zuisei engine, and the switch to the 940-horsepower Nakajima Sakae 12 that powered the A6M2, the first major production model, after flight testing showed that the aircraft could exceed 500 km/h and turn more tightly than any fighter the Japanese Navy had flown. The second part examines the new aluminium alloy, Extra Super Duralumin, that made the light structure possible, together with the flush riveting that reduced drag and helped the aircraft reach its high speed on modest power. Both parts return to the same trade-off: the thin skin and light structure dented and cracked easily, the aircraft could not absorb battle damage, and an unprotected fuel tank could be set on fire by a single incendiary bullet, a weakness Horikoshi accepted because the Navy’s specification left him no other way to meet the range and manoeuvrability it demanded.
The Weight-Saving Design
Horikoshi’s answer was to make the aircraft as light as he possibly could. He kept the airframe simple and clean, and he omitted the things that other air forces considered essential: armour plate behind the pilot’s seat, bulletproof glass, and self-sealing fuel tanks. Every kilogram saved went into fuel and into the large wing that gave the Zero its lift and its turning ability. The first prototype, powered by a Mitsubishi Zuisei engine of 780 horsepower, flew on 1 April 1939. The engine proved underpowered, and the second prototype was fitted with the Nakajima Sakae 12 radial of 940 horsepower, which became the standard engine of the A6M2, the first major production model. Flight testing showed that the Zero could exceed 500 km/h and turn more tightly than any fighter the Japanese Navy had flown, and the Navy ordered it into production in 1940, giving it the designation A6M and the popular name “Reisen”, usually shortened in the West to “Zero” from the last digit of the Japanese year 2600, the year of its adoption.
A New Aluminium Alloy
A central part of the weight saving was a new aluminium alloy developed in Japan, known as Extra Super Duralumin, which was used for the main structure of the wing and fuselage. The alloy was stronger for its weight than the materials used in most contemporary fighters, and it allowed Horikoshi to build a large wing and a long fuselage without the weight penalty that would normally follow. The airframe also used flush riveting on the outer skin, which reduced drag and helped the Zero reach its high speed on only 940 horsepower. The cost of this lightness was fragility: the thin skin and light structure dented and cracked easily, the aircraft could not absorb battle damage, and the unprotected fuel tanks in the wings and fuselage could be set on fire by a single incendiary bullet. Horikoshi knew the trade-off, and he accepted it, because the Navy’s specification left him no other way to meet the range and manoeuvrability it demanded.
Combat Debut in China
The Zero entered combat in China in the summer of 1940, before Japan’s war with the Western powers began. Twelve A6M2s of the 12th Combined Air Group, based in China, destroyed 27 Chinese aircraft in their first engagements without loss, and in the months that followed the Zero swept the Chinese Air Force from the sky over Chungking and Chengtu. The Japanese Navy kept the type’s performance secret, and the Western powers, who had dismissed Japanese aircraft as copies of Western designs, had no idea what they were about to meet. When Japan attacked Pearl Harbor on 7 December 1941, the Zero was already a proven combat aircraft, flown by pilots who had been trained for years in carrier operations and in the aerobatics that the Zero’s manoeuvrability made possible.
4. Design
Airframe and Wing
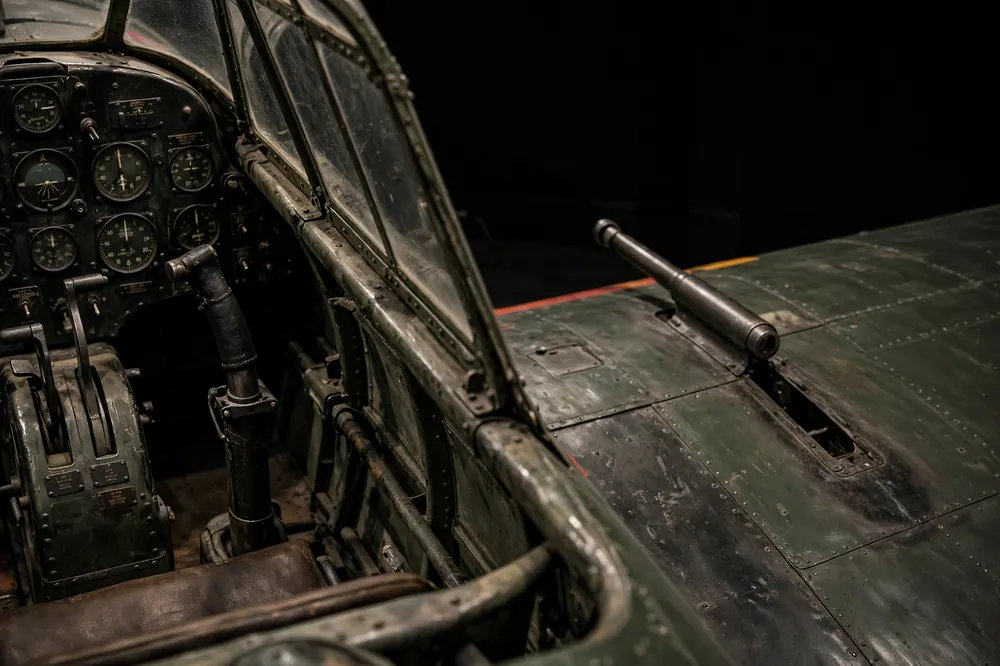
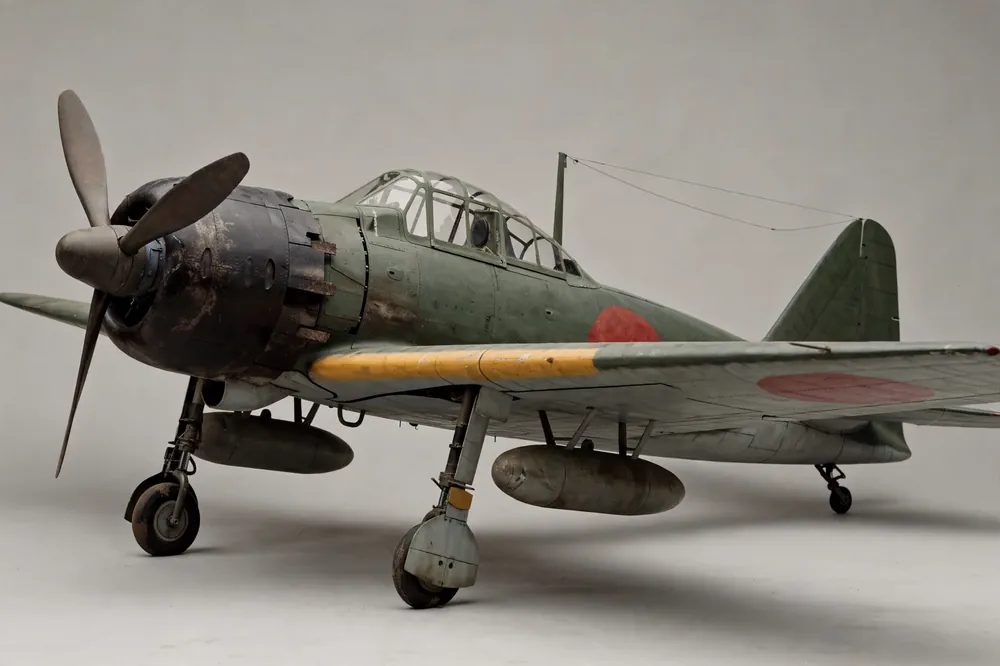
The Zero was a low-wing monoplane of all-metal construction, with a retractable tailwheel undercarriage, an enclosed cockpit and a clean, unbraced airframe. Its most important feature was its wing: a large, tapered wing of about 12 metres span on the A6M2, with a low wing loading that gave the aircraft a very tight turning circle and a gentle stall. The wing carried the two 20 mm Type 99 cannon, one in each wing, and the two 7.7 mm machine guns were mounted in the nose, synchronised to fire through the propeller. Later models carried heavier cannon and, in the fighter-bomber versions, bomb racks under the wings. The cockpit was roomy by Japanese standards and gave the pilot a good view, particularly forward and to the sides, although the view to the rear was poor. The pilot sat on a simple seat with no armour behind it, and the fuel tanks were unprotected, so that a single incendiary bullet could set the aircraft on fire.
Engine and Flying Qualities
The Sakae radial engine gave the Zero its speed and its climb, but the aircraft’s light weight was what turned modest power into remarkable performance, and this section explains both halves of that equation and the limits that came with them. The first part looks at power and speed: the 940 horsepower of the A6M2 and the 1,130 horsepower of the later A6M5, set against an empty weight of about 1,680 kilograms, against about 2,600 kilograms for the American F4F Wildcat, which was enough for a top speed of about 533 km/h, a climb to 6,000 metres in about seven and a half minutes, and a range of about 1,870 kilometres on internal fuel and about 3,100 kilometres with a drop tank, far greater than that of any Allied fighter of 1941. The same part sets out the price of that lightness, because the Zero could not take the punishment that the Wildcat, the Hellcat and the Corsair could absorb, and damage that an American fighter would survive often destroyed a Zero outright. The second part turns to high-speed handling, where the Zero’s controls stiffened above about 480 km/h, the ailerons became heavy just when a pilot most needed them, and the aircraft was slower in a dive than its American rivals, with its maximum diving speed limited by the strength of its light airframe. American pilots learned to dive away from a Zero, knowing it could not follow them down, and to attack from above and from the sides, where its lack of protection was fatal, while in a slow turning fight the Zero remained supreme, praised by every pilot who flew it for its harmony of control at low and medium speeds.
Power and Speed
The Sakae radial engine gave the A6M2 about 940 horsepower and the later A6M5 about 1,130 horsepower, and the aircraft’s light weight — an empty weight of about 1,680 kilograms, against about 2,600 kilograms for the American F4F Wildcat — meant that this modest power was enough for a top speed of about 533 km/h and a climb rate that impressed every Allied pilot who met the Zero. The Zero could climb to 6,000 metres in about seven and a half minutes, and its range, about 1,870 kilometres on internal fuel and about 3,100 kilometres with a drop tank, was far greater than that of any Allied fighter of 1941. The price was fragility. The Zero could not take the punishment that the Wildcat, the Hellcat and the Corsair could absorb, and its light structure meant that damage which an American fighter would survive often destroyed a Zero outright.
High-Speed Handling
At high speed the Zero’s controls stiffened, so that above about 480 km/h the pilot needed great strength to roll the aircraft, and its ailerons became heavy just when a pilot most needed them in a dive or in a fast rolling manoeuvre. American pilots learned to dive away from a Zero, knowing that it could not follow them down at high speed, and to attack from above and from the sides, where the Zero’s lack of protection was fatal. The Zero was also slower in a dive than the American fighters, and its maximum diving speed was limited by the strength of its light airframe. In a slow turning fight the Zero was supreme, and every pilot who flew it praised its harmony of control at low and medium speeds; in a fast fight, fought with diving attacks and with teamwork, the same qualities counted for little, and the Zero’s pilots found themselves outmatched by aircraft that were heavier, faster and far better protected.
The Limits of Development
Horikoshi and his team continued to develop the Zero throughout the war, but the basic airframe, designed for a 940-horsepower engine, could not easily take a more powerful one, and the Japanese aircraft industry, short of materials and of high-octane fuel, could not produce an engine in the 1,500 to 2,000 horsepower class that powered the American fighters. The A6M5 of 1943, with shorter, strengthened wings, a more powerful Sakae 21 engine and a higher diving speed, was the best of the series, but it was still slower than the Hellcat and the Corsair, and its pilots were by then often inexperienced young men, replacing the veterans lost at Midway, in the Solomons and over New Guinea. The Zero’s design, which had been a triumph in 1939, had become a trap by 1943: Japan could not replace it with a better fighter in time, and it went on building Zeros because it had nothing else in sufficient numbers.
5. Variants
Main Production Variants
| Variant | Years | Key features | Production |
|---|---|---|---|
| A6M1 | 1939 | Prototypes with Zuisei engine; two built | 2 |
| A6M2 Model 11 | 1940 | First production model; Sakae 12, 940 hp; folding wingtips on Model 21 | About 740 (Model 11/21) |
| A6M2 Model 21 | 1940–1942 | Main early-war model; folding wingtips for carriers; Pearl Harbor and Midway | Main production to 1942 |
| A6M3 Model 32 | 1942 | Shorter, squared wingtips; Sakae 21, 1,130 hp; reduced range | About 343 |
| A6M3 Model 22 | 1942–1943 | Longer wings restored; range recovered; used over the Solomons | About 560 |
| A6M5 Model 52 | 1943–1944 | Shortened, strengthened wings; higher diving speed; most-produced variant | About 6,000 |
| A6M5c Model 52c | 1944 | Extra 13.2 mm machine guns; armour and self-sealing tanks at last; heavier | About 470 |
| A6M6 Model 53c | 1944–1945 | Sakae 31 engine with water-methanol injection; few built | About 93 |
| A6M7 Model 63 | 1945 | Fighter-bomber with bomb racks; used widely as kamikaze aircraft | About 1,000 |
| A6M2-N “Rufe” | 1941–1943 | Floatplane version for island bases; 327 built | 327 |
| A6M2-K | 1943–1945 | Two-seat trainer version | About 508 |
The table above shows how the Zero changed during the war, and how production shifted from the long-winged A6M2 of 1940 to the strengthened A6M5 of 1943, which alone accounted for more than half of all Zeros built. The early models were built for range and manoeuvrability, and the later models were built for diving speed, for heavier armament and, at last, for a measure of protection, even though each addition made the aircraft heavier and slower. The numbers in the table are the figures most commonly given in the published histories, and they are rounded, because Mitsubishi and Nakajima records were incomplete after the bombing of their factories and the destruction of documents at the end of the war.
The A6M5, the Definitive Zero
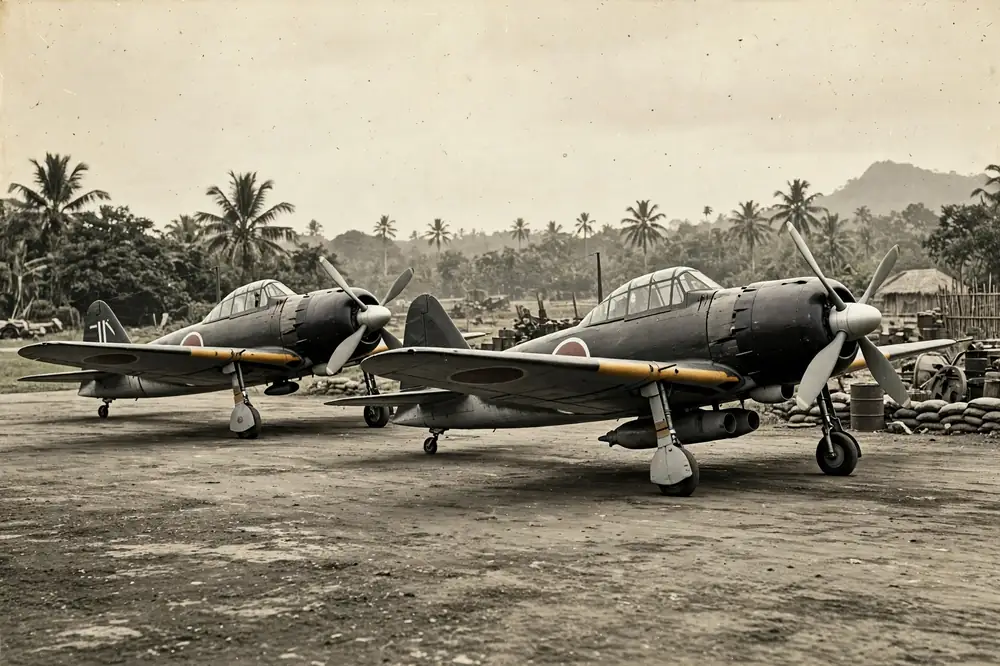
The A6M5, introduced in 1943, was the best of the series and the version that most people picture when they think of the Zero. It had wings strengthened and shortened again, but with the tips rounded, a more powerful Sakae 21 engine, a higher diving speed and, in the later A6M5c, two additional 13.2 mm machine guns in the wings and, at last, armour behind the pilot and self-sealing fuel tanks. The A6M5 fought the Hellcat and the Corsair over the Marianas and the Philippines in 1944, and it was the version that Japanese pilots flew in the last great carrier battle, the Battle of the Philippine Sea. By then the additions that the early Zero had lacked were being fitted, but they made the aircraft heavier and slower, and they could not close the gap with the American fighters, which were faster, more heavily armed and flown by pilots who had been trained in large numbers.
Special Versions
The Zero was built in more than one form, and this section covers the two special versions that took the basic design away from the carrier fighter role for which it was designed. The first was the floatplane version, the A6M2-N ‘Rufe’, built for use from island anchorages where no airfield existed, with 327 examples built between 1941 and 1943. The Rufe kept the Zero’s wing and engine but was fitted with a large central float and two smaller floats under the wings, which made it slower and less manoeuvrable than the landplane version, yet it was used in the Aleutians, in the Solomons and in the Dutch East Indies, fighting American fighters and bombers from the water, and it was respected by Allied pilots for its handling even though it was no match for a purpose-built fighter. The second was the two-seat trainer version, the A6M2-K, built in a total of about 508 examples and used to train the last generation of Japanese fighter pilots. It had a lengthened fuselage with a second cockpit behind the first, and it kept the Zero’s wing and engine so that a trainee could learn the aircraft’s handling before flying it alone. By 1944 and 1945, when fuel was short and experienced instructors were few, the A6M2-K was used to give young pilots as much flying time as possible before they were sent to front-line units, and many of the pilots who flew kamikaze missions in 1945 had learned to fly in an A6M2-K, a reminder that the Zero was not only a weapon but also a school, and that Japan’s pilot training system, which had produced the superb pilots of 1941, was by then struggling to produce pilots at all.
The Floatplane Rufe
The floatplane version, the A6M2-N “Rufe”, was built for use from island anchorages where no airfield existed, and 327 were built between 1941 and 1943. The Rufe kept the Zero’s wing and engine, but it was fitted with a large central float and two smaller floats under the wings, and it was slower and less manoeuvrable than the landplane version. It was used in the Aleutians, in the Solomons and in the Dutch East Indies, where it fought American fighters and bombers from the water, and it was respected by Allied pilots for its handling, even though it was no match for a purpose-built fighter. The Rufe was one of the few floatplane fighters of the war to see extensive combat, and its pilots flew it in conditions that no other fighter could have operated in at all.
The Two-Seat Trainer
The two-seat trainer version, the A6M2-K, was built in a total of about 508 examples and was used to train the last generation of Japanese fighter pilots. It had a lengthened fuselage with a second cockpit behind the first, and it kept the Zero’s wing and engine, so that a trainee could learn the aircraft’s handling before flying it alone. By 1944 and 1945, when fuel was short and experienced instructors were few, the A6M2-K was used to give young pilots as much flying time as possible before they were sent to front-line units, and many of the pilots who flew kamikaze missions in 1945 had learned to fly in an A6M2-K. The trainer was a reminder that the Zero was not only a weapon, but also a school, and that Japan’s pilot training system, which had produced the superb pilots of 1941, was by then struggling to produce pilots at all.
6. Operational History
Pearl Harbor and the First Six Months
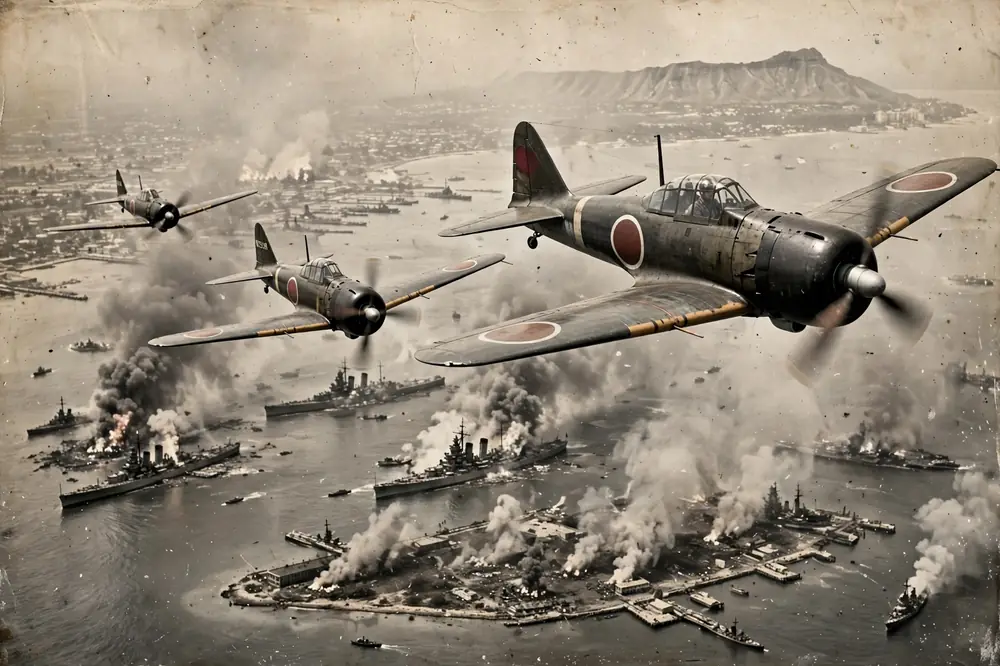
On 7 December 1941, 43 Zeros flew as fighter escort for the attack on Pearl Harbor, and they destroyed most of the few American fighters that got into the air, at a cost of nine Zeros lost in the whole attack. In the weeks that followed, Zeros escorted bombers over the Philippines, destroyed the American and Filipino air forces on the ground and in the air, and covered the landings in Malaya and the Dutch East Indies. Over Singapore, over Java and over the Indian Ocean, the Zero met the British Hurricane and the American P-40 and Buffalo, and outfought them all. The pilots who flew it — men such as Saburo Sakai, Hiroyoshi Nishizawa and Tetsuzo Iwamoto, who would become the leading Japanese aces of the war — found that they could out-turn any opponent, and that the Zero’s cannon could destroy a fighter with a short burst. By April 1942 Japan had taken the Philippines, Malaya, Singapore and the Dutch East Indies, and the Zero had become, in Allied eyes, a mysterious and terrifying weapon.
Midway and the Solomons
The Battle of Midway and the long campaign for Guadalcanal form the turning point of the Zero’s story, and this section explains how an aircraft that had dominated the Pacific in the first six months of the war lost its advantage without itself being to blame. The first part covers Midway in June 1942, where the four Japanese carriers lost took with them more than 100 trained pilots and many of the Navy’s best aircrew, a loss not only of aircraft but of experience, because the men who had flown the Zero in China and in the first six months of the Pacific War were gone, and their replacements had far less flying time and far less combat experience. Japan’s training system, designed for a small, elite air arm, could not expand quickly enough to meet the demands of a long war, and the quality of Japanese pilots declined steadily from Midway onwards, even as the number of American pilots grew. The second part follows the attrition over Guadalcanal, from August 1942 to February 1943, where Zeros flew from Rabaul, more than 1,000 kilometres away, to fight over the island, a flight that only the Zero’s range made possible, and fought the American Wildcats and later the Corsairs and Hellcats in a war of attrition that Japan could not win. The American pilots learned the Thach Weave, in which two Wildcats protected each other by crossing their paths, and learned to dive through a Zero formation, fire, and climb away, never turning with the Zero, so that by the end of 1943 the Zero’s advantage was gone, and American fighters, flown by pilots trained in large numbers and fighting in well-organised squadrons, were shooting Zeros down in increasing numbers.
The Turning Point at Midway
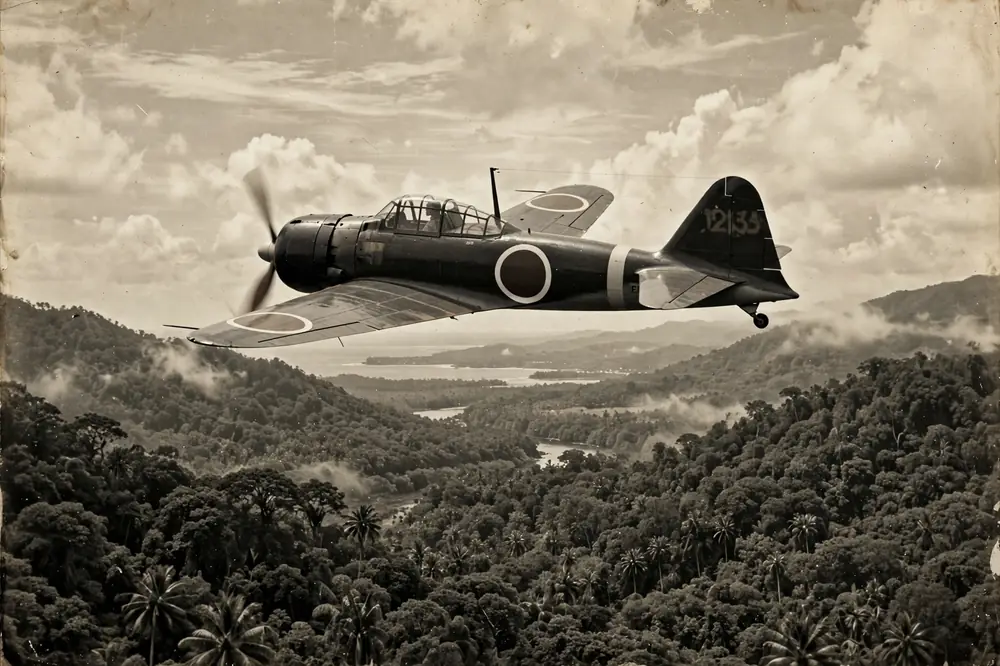
The Battle of Midway in June 1942 was the turning point, although the Zero itself was not to blame. The four Japanese carriers lost at Midway took with them more than 100 trained pilots and many of the Navy’s best aircrew, and the Japanese pilot training system, which took years to produce a carrier pilot, could not replace them. The loss was not only of aircraft, but of experience: the men who had flown the Zero in China and in the first six months of the Pacific War were gone, and their replacements had far less flying time and far less combat experience. Japan’s training system, which had been designed for a small, elite air arm, could not expand quickly enough to meet the demands of a long war, and the quality of Japanese pilots declined steadily from Midway onwards, even as the number of American pilots grew.
The Attrition over Guadalcanal
In the long campaign for Guadalcanal, from August 1942 to February 1943, Zeros flew from Rabaul, more than 1,000 kilometres away, to fight over the island — a flight that only the Zero’s range made possible — and they fought the American Wildcats and later the Corsairs and Hellcats in a war of attrition that Japan could not win. The American pilots learned the Thach Weave, a tactic in which two Wildcats protected each other by crossing their paths, and they learned to dive through a Zero formation, fire, and climb away, never turning with the Zero. By the end of 1943 the Zero’s advantage was gone, and the American fighters, flown by pilots who had been trained in large numbers and who fought in well-organised squadrons, were shooting Zeros down in increasing numbers, while Japanese squadrons were filled with young men who had only a fraction of the flying time of the pilots they replaced.
The Akutan Zero and the Loss of the Secret
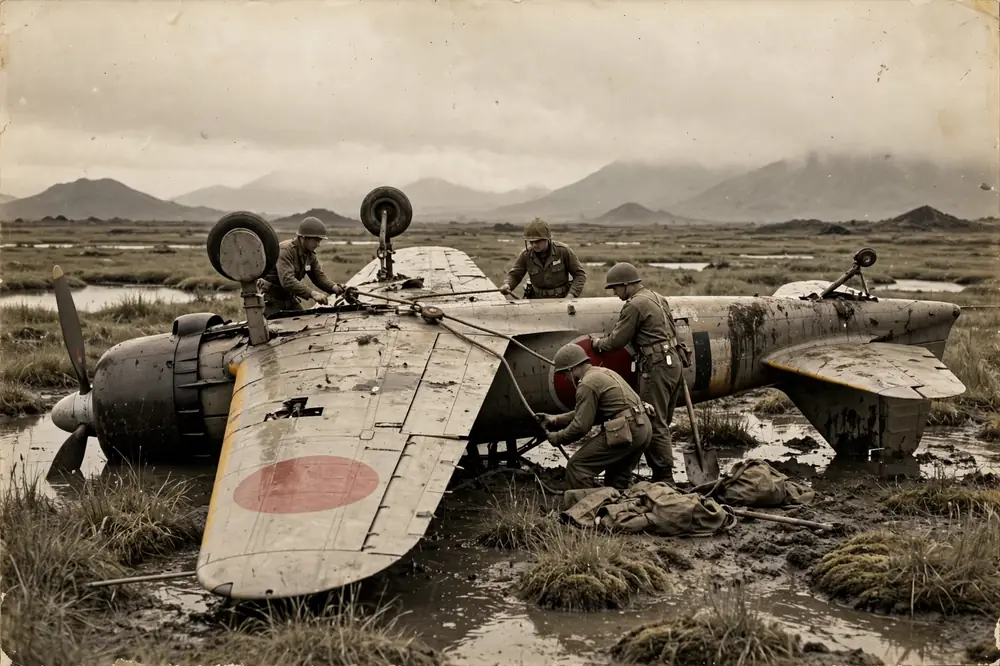
In July 1942 an A6M2 flown by Petty Officer Tadayoshi Koga crashed on Akutan Island in Alaska, after its engine failed on a mission against Dutch Harbor. The pilot was killed, but the aircraft landed almost intact in a marsh, and American forces recovered it, shipped it to San Diego and flew it against American fighters. For the first time the Americans could measure the Zero’s performance and its weaknesses: its lack of armour, its vulnerability to fire, its stiffening controls at high speed, and its slow roll at high speed. The information was passed to every fighter squadron in the Pacific, and it confirmed what combat pilots had already learned — that the Zero should be fought with speed and with diving attacks, never in a turning fight. The Akutan Zero is now displayed at the National Air and Space Museum, and it is one of the most important captured aircraft of the war.
The Last Years and the Kamikaze
In 1944 and 1945 the Zero fought over the Marianas, the Philippines and Okinawa, and in the defence of Japan itself. At the Battle of the Philippine Sea in June 1944, the “Great Marianas Turkey Shoot”, American Hellcats shot down hundreds of Japanese aircraft, many of them Zeros flown by inexperienced pilots, and the Japanese carrier air arm was effectively destroyed. From October 1944 the Zero was used in large numbers as a kamikaze aircraft, carrying a bomb under the fuselage and flown by a pilot who would deliberately crash it into an American ship. The Zero’s long range and its ability to carry a bomb made it suitable for the role, and hundreds of Zeros were lost in kamikaze attacks off the Philippines and Okinawa. The last Zeros fought in the defence of Japan in the summer of 1945, and the type was still in production when the war ended on 15 August 1945. Saburo Sakai, who survived the war with 64 victories, remained the most famous Zero pilot, and his memoir, Samurai!, introduced the Zero to a Western audience after the war.
7. Performance and Specifications
A6M2 Compared with A6M5
| Specification | A6M2 Model 21 | A6M5 Model 52 |
|---|---|---|
| Engine | Nakajima Sakae 12, 940 hp | Nakajima Sakae 21, 1,130 hp |
| Maximum speed | About 533 km/h at 4,550 m | About 565 km/h at 6,000 m |
| Cruise speed | About 330 km/h | About 350 km/h |
| Range (internal fuel) | About 1,870 km | About 1,920 km |
| Range (with drop tank) | About 3,100 km | About 2,560 km |
| Service ceiling | About 10,000 m | About 11,700 m |
| Climb to 6,000 m | About 7 min 27 sec | About 7 min 1 sec |
| Empty weight | About 1,680 kg | About 1,876 kg |
| Maximum take-off weight | About 2,796 kg | About 3,175 kg |
| Armament | 2 × 20 mm cannon, 2 × 7.7 mm MG | 2 × 20 mm cannon, 2 × 7.7 mm MG |
| Number built | About 740 (Model 11/21) | About 6,000 |
The table shows the real progress and the real limits of the Zero’s development. The A6M5 was faster, it climbed better and it could fly higher than the A6M2, and it was stronger in a dive, but it was also heavier, and its range with a drop tank was shorter, because the shortened wing carried less fuel and the heavier airframe needed more power to fly the same distance. The figures are the values most commonly given in the published histories, and they vary slightly between sources, because different aircraft were tested at different weights and with different equipment, and because Japanese records are incomplete. The reader should treat the numbers as approximate, and as a guide to the difference between the two models rather than as exact measurements for a single aircraft.
Comparison with Allied Fighters
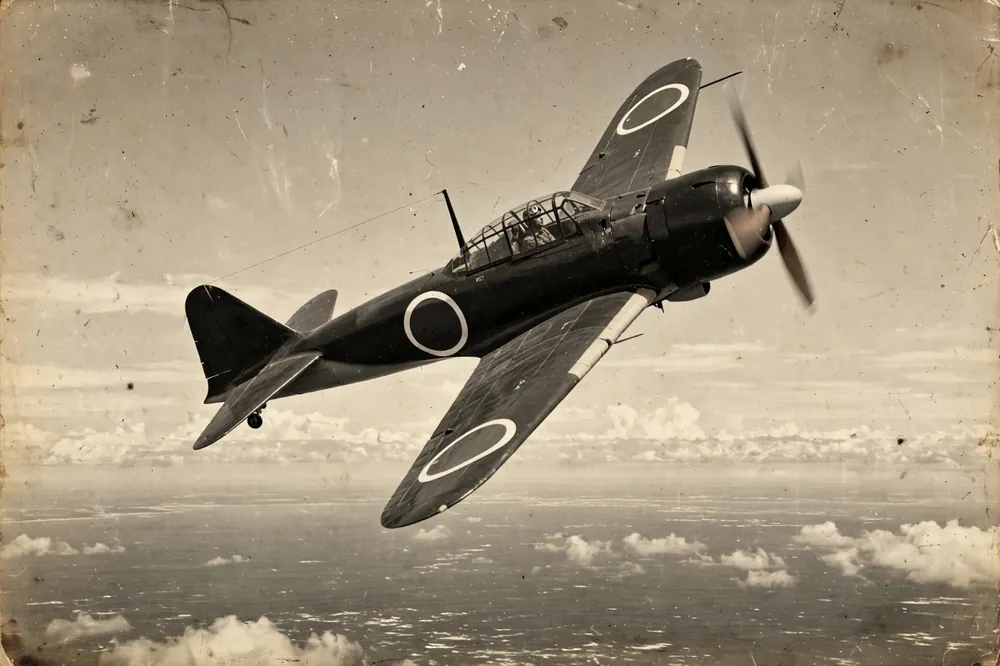
Compared with its rivals, the Zero’s advantage in 1941 was its combination of range and manoeuvrability, and its disadvantage was its fragility and its lack of power. The F4F Wildcat was slower and less manoeuvrable, but it was armoured, it had self-sealing tanks and it could take far more damage; the Wildcat’s kill ratio against the Zero improved steadily as American pilots learned the right tactics. The F6F Hellcat, which entered service in 1943, was faster, more heavily armed with six 12.7 mm machine guns, armoured and powered by a 2,000-horsepower engine, and it shot down more Japanese aircraft than any other American fighter, with a claimed ratio of about 19 to 1. The Zero could still out-turn the Hellcat, but in a war fought at high speed and in diving attacks, turning was no longer enough. The Zero’s performance, which had been remarkable in 1940, was ordinary by 1944, and the Japanese industry could not give it the engine it needed to keep up.
What the Numbers Mean in Combat
The numbers in the table explain why the Zero won in 1941 and lost in 1944. In 1941 its range let it appear where the enemy did not expect it, its climb let it attack from above, and its turning let it win the dogfight that followed; in 1944 the same numbers meant that it arrived slowly, that it could not escape by diving, and that a short burst from a Hellcat’s six machine guns could set it on fire. The Zero’s pilots knew this, and they fought with the skill that their training had given them, but skill could not make up for an aircraft that was slower, more fragile and less well armed than the aircraft it faced. The lesson of the Zero’s performance is that an aircraft is not judged by one number, but by the balance of its numbers, and by the tactics, the training and the industrial system that support it.
Diving Speed and Control Forces
The Zero’s diving speed was limited by the strength of its light airframe and by the stiffening of its ailerons at high speed, and American test pilots who flew the Akutan Zero reported that above about 480 kilometres per hour the aircraft became difficult to roll, and that its controls required great physical strength. The A6M5, with its shortened and strengthened wings, improved the diving speed, but it was still slower in a dive than the Hellcat and the Corsair, and its pilots were taught to avoid diving after an American fighter, because they could not catch it, and because the Zero’s light structure could be damaged by a high-speed dive. The diving limitation was one of the Zero’s most important weaknesses, and it was exploited by American pilots, who would dive through a Zero formation, fire, and climb away, knowing that the Zero could not follow them down.
8. Operators
The Imperial Japanese Navy
The Zero was used almost exclusively by the Imperial Japanese Navy, which operated it from its aircraft carriers and from land bases throughout the Pacific. The Navy’s carrier air groups — aboard Akagi, Kaga, Soryu, Hiryu, Shokaku and Zuikaku — flew the Zero at Pearl Harbor, Midway and the Coral Sea, and land-based units at Rabaul, in the Solomons and in New Guinea flew it in the long air war of 1942 and 1943. The Imperial Japanese Army, which had its own fighters, did not operate the Zero, although Army pilots sometimes flew captured examples. The Navy’s use of the Zero was central to its strategy: the carrier was the main weapon of the Japanese fleet, and the Zero was the fighter that protected the carrier and escorted its bombers, so that the fate of the Zero and the fate of the carrier force were bound together from Pearl Harbor to the Philippine Sea.
Other Users After the War
After the war the Zero passed into other hands, and this section traces what happened to the aircraft once it was no longer the fighter of the Imperial Japanese Navy. The first part looks at captured Zeros in Allied hands: the Chinese Nationalists and the Chinese Communists flew captured examples, the French used a few in Indochina, and the Royal Thai Air Force operated a small number, while the United States, Britain and the Soviet Union flew captured Zeros for evaluation, and the Akutan Zero and other captured aircraft gave the Allies the information they needed to defeat the type. These captured aircraft were flown by test pilots who wrote detailed reports on the Zero’s handling, its performance and its weaknesses, and those reports were passed to fighter squadrons and to the designers of the next generation of Allied fighters. The captured Zeros were never used in combat by the Allies, but they were among the most valuable aircraft of the war, because they told the enemy exactly what it faced. The second part explains the end of front-line service: no country operated the Zero as a front-line fighter after the late 1940s, and the type’s service life ended with the war that had made it famous. The surviving aircraft were used for a short time as trainers and as liaison aircraft, and then they were scrapped, stored or sent to museums, where they were preserved as examples of the aircraft that had dominated the Pacific in 1941 and 1942. The end of the Zero’s service was not a judgement on the aircraft itself, but on the world that had produced it: Japan’s aircraft industry was dismantled after the war, its pilots were demobilised, and the Zero, which had been built for a war that Japan had lost, had no place in the peacetime air forces that followed.
Captured Zeros in Allied Hands
After the war a small number of Zeros were used by other air forces: the Chinese Nationalists and the Chinese Communists flew captured Zeros, the French used a few in Indochina, and the Royal Thai Air Force operated a small number. The United States, Britain and the Soviet Union flew captured Zeros for evaluation, and the Akutan Zero and other captured aircraft gave the Allies the information they needed to defeat the type. These captured aircraft were flown by test pilots who wrote detailed reports on the Zero’s handling, its performance and its weaknesses, and those reports were passed to fighter squadrons and to the designers of the next generation of Allied fighters. The captured Zeros were never used in combat by the Allies, but they were among the most valuable aircraft of the war, because they told the enemy exactly what it faced.
The End of Front-Line Service
No country operated the Zero as a front-line fighter after the late 1940s, and the type’s service life ended with the war that had made it famous. The surviving aircraft were used for a short time as trainers and as liaison aircraft, and then they were scrapped, stored or sent to museums, where they were preserved as examples of the aircraft that had dominated the Pacific in 1941 and 1942. The end of the Zero’s service was not a judgement on the aircraft itself, but on the world that had produced it: Japan’s aircraft industry was dismantled after the war, its pilots were demobilised, and the Zero, which had been built for a war that Japan had lost, had no place in the peacetime air forces that followed.
9. Legacy and Influence
A Lesson in Design Trade-Offs
The Zero’s legacy is the lesson that a fighter designed for manoeuvrability and range at the expense of protection can dominate a war for a year and then lose it, because the enemy learns, adapts and out-produces it. The Zero forced the United States to rethink its fighter tactics and its fighter designs: the Thach Weave, the emphasis on diving attacks and teamwork, and the Hellcat and the Corsair, which were designed with the Zero in mind, all came from the experience of fighting the Zero. The Zero also showed the importance of pilot training: Japan’s pre-war pilots were among the best in the world, but Japan trained too few replacements, and the loss of the veterans at Midway and in the Solomons could not be made good. The lesson has been studied by every air force since, and it is still taught in staff colleges as an example of how a brilliant design can fail when the system that supports it fails.
The Long-Range Carrier Fighter
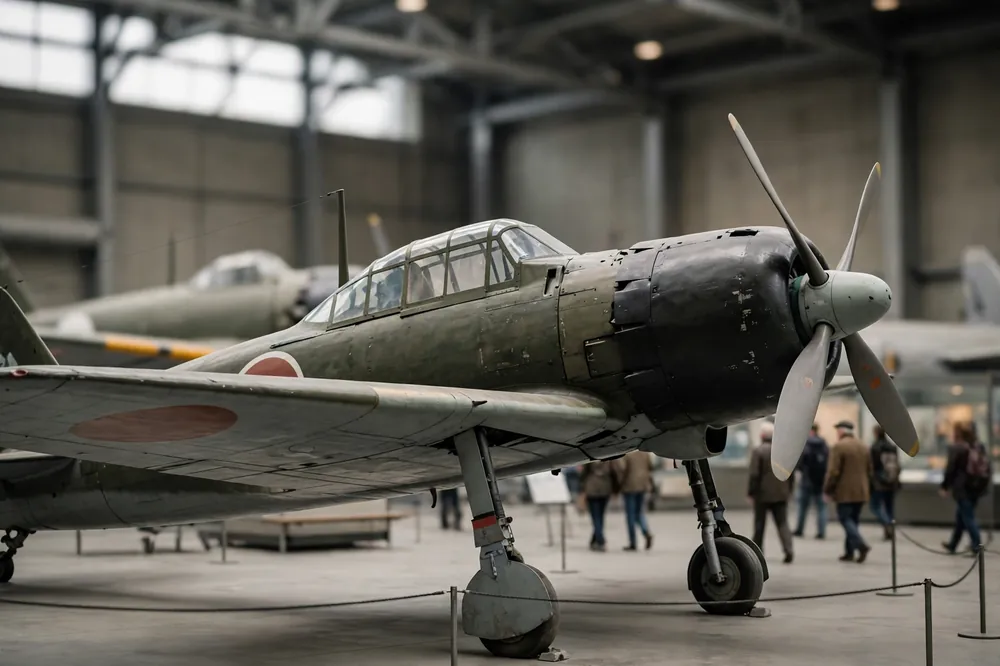
The Zero’s influence on aircraft design was lasting: the idea of a long-range carrier fighter, which the Zero pioneered, became standard after the war, and the Japanese aircraft industry, rebuilt after 1945, remembered Horikoshi’s achievement with the Zero and with the later designs he worked on. The Zero showed that a carrier fighter did not have to be short-ranged, and that a navy which could strike from far away had an advantage that no land-based air force could match. After the war, every navy that operated carriers sought a fighter with the range that the Zero had shown was possible, and the jet fighters that followed were designed with range as a central requirement, not as an afterthought. The Zero’s wing, with its low loading and its gentle stall, also influenced the design of later Japanese aircraft, and Horikoshi’s work on the Zero remained a reference for Japanese engineers for decades.
The Zero in Popular Culture
In popular culture the Zero has become the symbol of the Pacific War, appearing in films, in books and in model kits, and the sound of its Sakae engine and the sight of its red sun roundel remain instantly recognisable. For historians the Zero is a reminder that a weapon’s quality is not only its performance on paper, but the industrial system, the training system and the tactics that support it. The Zero appears in films such as Tora! Tora! Tora! and in the memoir Samurai!, and it is one of the most modelled aircraft in the world, with kits in every scale and in every variant. The aircraft’s elegant lines and its tragic history — a brilliant design, flown by brave pilots, in a war that Japan could not win — have given it a place in the imagination that few other aircraft have matched, and it remains, more than eighty years after its first flight, the aircraft that most people think of when they think of the Pacific War.
The Zero in Film and Memory
The Zero has appeared in many films about the Pacific War, including Tora! Tora! Tora!, Pearl Harbor and Midway, where it is shown as the aircraft that attacked Pearl Harbor, and where its red sun roundel and its elegant lines make it instantly recognisable to audiences who have never seen a real Zero. The aircraft’s appearance in films has made it familiar to millions of people, and it has ensured that the Zero will be remembered, not only as a weapon, but as a symbol of the Pacific War, and of the men who flew it, on both sides. The Zero’s place in film is a measure of its fame, and it is a reminder that an aircraft’s story is told not only in books and in museums, but in the films that bring it to life for new generations, who learn about the Pacific War through the aircraft that fought in it.
10. Surviving Examples
Museums in the United States
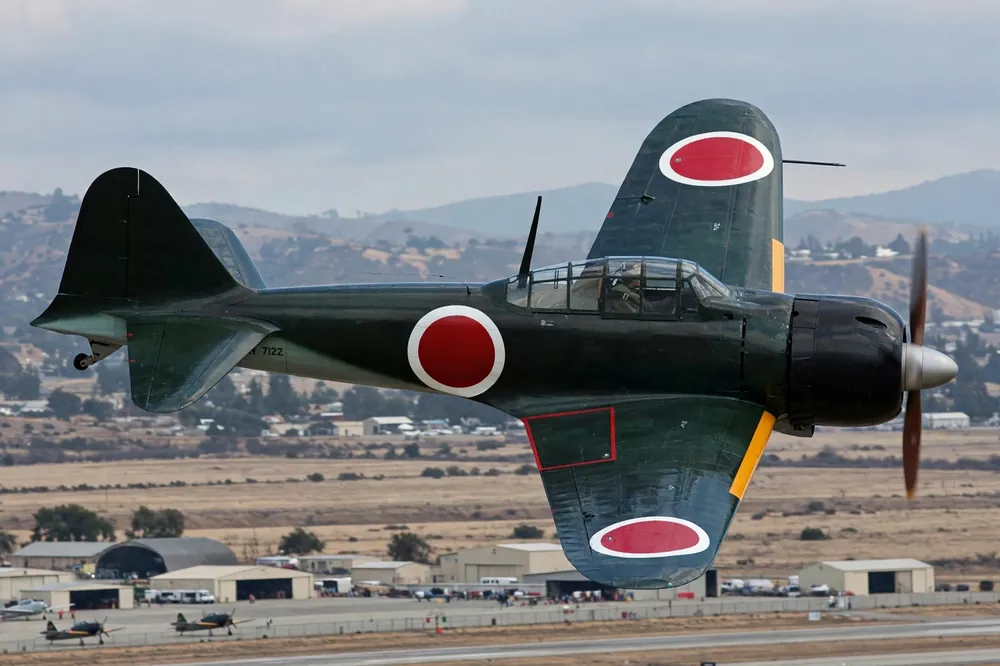
About a dozen Zeros survive in museums and in private collections, and only a handful are airworthy. The most famous is the A6M2 recovered from Akutan Island, which is displayed at the National Air and Space Museum in Washington, D.C., after years of study by American engineers. The Planes of Fame Air Museum in Chino, California, flies an A6M5 that was recovered from Babo Island in New Guinea and restored over many years, and it is one of the few Zeros that still flies with its original Sakae engine. Other surviving Zeros are held at the National Museum of the Pacific War in Fredericksburg, Texas, and at the Pearl Harbor Aviation Museum in Hawaii, where visitors can see the aircraft that attacked Pearl Harbor at close range and can learn about the pilots who flew it and the men who fought against it.
Museums in Britain, Australia and Japan
Only about a dozen Zeros survive, and this section guides the reader to the examples preserved in Britain, Australia and Japan, and to the replicas that keep the aircraft flying. The first part covers Duxford and Canberra: the Imperial War Museum at Duxford in England displays an A6M2, and the Australian War Memorial in Canberra displays a Zero recovered from New Guinea. Both aircraft were recovered from the battlefields of the Pacific, and both were restored by museum staff who had to learn the construction methods of the Zero, including the use of Extra Super Duralumin and the flush riveting that Horikoshi had pioneered. The Duxford Zero is displayed with other aircraft of the Pacific War, and the Canberra Zero is displayed as part of the story of Australia’s war in New Guinea, where Australian soldiers and airmen fought the Japanese in some of the hardest fighting of the war, so that for visitors in Britain and Australia these two aircraft are the easiest way to see a real Zero at close range. The second part turns to Tokyo and to the airworthy replicas: at the Yushukan Museum in Tokyo, a Zero is displayed as a memorial to the pilots who flew it, and it is one of the most visited exhibits in the museum. Several airworthy replicas, built with American engines and with modern materials, fly at airshows in the United States, and the Zero remains one of the most sought-after warbirds by collectors and by museums. For most visitors, the easiest way to see a real Zero is at the National Air and Space Museum or at the Planes of Fame, where the aircraft’s light, elegant lines can be appreciated at close range, and where the story of the men who flew it, and of the men who fought it, is told alongside the aircraft itself.
Duxford and Canberra
The Imperial War Museum at Duxford in England displays an A6M2, and the Australian War Memorial in Canberra displays a Zero recovered from New Guinea. Both aircraft were recovered from the battlefields of the Pacific, and both were restored by museum staff who had to learn the construction methods of the Zero, including the use of Extra Super Duralumin and the flush riveting that Horikoshi had pioneered. The Duxford Zero is displayed with other aircraft of the Pacific War, and the Canberra Zero is displayed as part of the story of Australia’s war in New Guinea, where Australian soldiers and airmen fought the Japanese in some of the hardest fighting of the war. For visitors in Britain and Australia, these two aircraft are the easiest way to see a real Zero at close range.
Tokyo and Airworthy Replicas
At the Yushukan Museum in Tokyo, a Zero is displayed as a memorial to the pilots who flew it, and it is one of the most visited exhibits in the museum. Several airworthy replicas, built with American engines and with modern materials, fly at airshows in the United States, and the Zero remains one of the most sought-after warbirds by collectors and by museums. For most visitors, the easiest way to see a real Zero is at the National Air and Space Museum or at the Planes of Fame, where the aircraft’s light, elegant lines can be appreciated at close range, and where the story of the men who flew it — and of the men who fought it — is told alongside the aircraft itself.
Frequently Asked Questions
What is the Mitsubishi A6M Zero?
The Mitsubishi A6M Zero was the Imperial Japanese Navy’s carrier fighter of the Second World War, designed by Jiro Horikoshi. It was known for its manoeuvrability and very long range, and about 10,939 were built.
Why was the Zero so manoeuvrable?
The Zero was built as light as possible, using a new aluminium alloy and omitting armour and self-sealing fuel tanks, and it had a large wing with low wing loading. That gave it a very tight turning circle, but made it fragile and easy to set on fire.
How did Allied pilots defeat the Zero?
Allied pilots learned not to turn with the Zero. They used diving attacks, teamwork such as the Thach Weave, and their fighters’ speed, armour and rugged construction, and by 1943 the Hellcat and the Corsair had taken the advantage.
What happened to the Akutan Zero?
An A6M2 crashed almost intact on Akutan Island, Alaska, in July 1942. American forces recovered it, flew it in tests and learned its strengths and weaknesses, and it is now displayed at the National Air and Space Museum.
How many Zeros were built?
About 10,939 Zeros were built by Mitsubishi and Nakajima between 1940 and 1945, more than any other Japanese aircraft of the war.
Where can I see a Zero today?
The Akutan Zero is at the National Air and Space Museum in Washington, D.C. An airworthy A6M5 flies at the Planes of Fame Air Museum in Chino, California, and other Zeros are at Duxford in England and at the Australian War Memorial in Canberra.
Sources
- Wikipedia, “Mitsubishi A6M Zero” — production of about 10,939, specifications for the A6M2 and A6M5, variants and the Akutan Zero.
- National Air and Space Museum, “Mitsubishi A6M5 Zero” — the Akutan Zero recovery, specifications and service history.
- Jiro Horikoshi, Eagles of Mitsubishi: The Story of the Zero Fighter (University of Washington Press, 1981) — design, the 12-shi specification and development.
- Saburo Sakai, Martin Caidin and Fred Saito, Samurai! (Bantam Books, 1978) — combat experience of a Zero pilot and the air war over the Solomons.
- Robert C. Mikesh, Zero: Combat and Development History of Japan’s Legendary Mitsubishi A6M Zero Fighter (Motorbooks, 1994) — variants, performance and surviving examples.
- John B. Lundstrom, The First Team: Pacific Naval Air Combat from Pearl Harbor to Midway (Naval Institute Press, 1984) — the Zero in combat in 1941–1942 and the loss of trained pilots.