 WAR ATLAS MILITARY HISTORY MAGAZINE · WWI — WWII
Mitsubishi G4M Betty
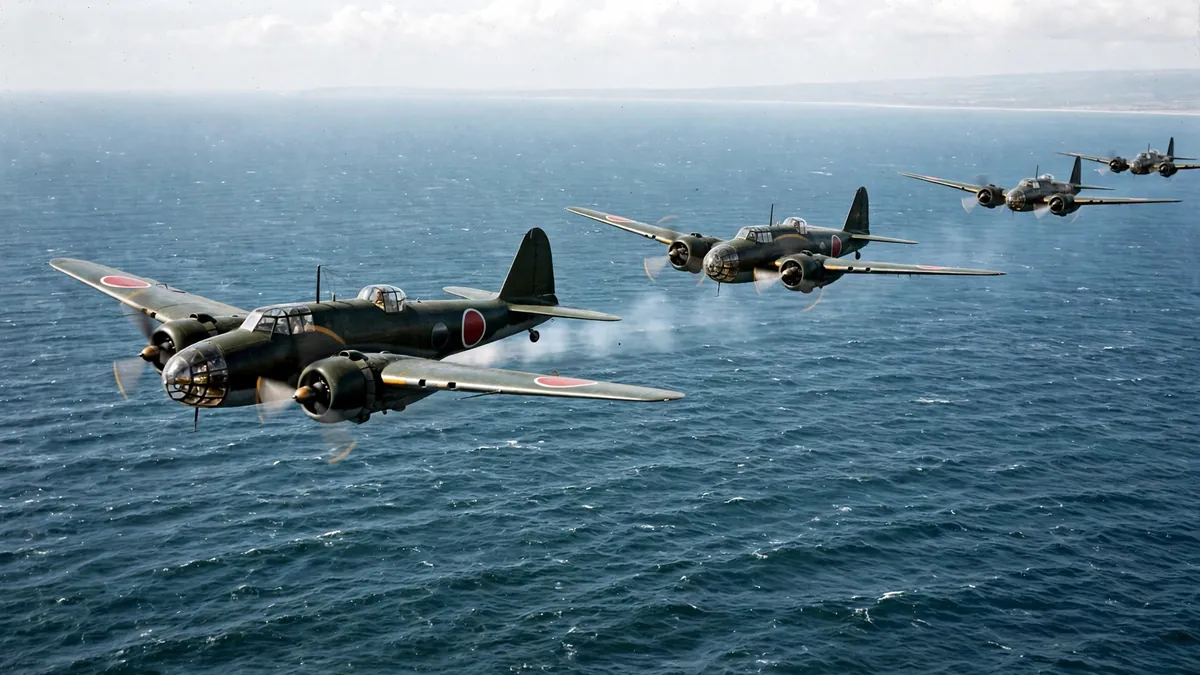
The Mitsubishi G4M Betty was the Imperial Japanese Navy’s principal land-based bomber of the Second World War, and one of the most important Japanese aircraft of the conflict. A twin-engine bomber with a range of nearly 3,000 kilometres, the G4M could strike targets far beyond the reach of any other Japanese bomber, and in the opening months of the Pacific War it was the instrument of some of Japan’s most spectacular victories: on 10 December 1941, G4Ms of the 22nd Air Flotilla, flying from bases in Indochina, sank the British battleship Prince of Wales and the battlecruiser Repulse off Malaya, in the first sinking of capital ships at sea by air attack alone.
The G4M went on to serve in every theatre of the Pacific War, from the Solomons to New Guinea to the Philippines, and it was in a G4M that Admiral Isoroku Yamamoto, the architect of the Pearl Harbor attack, was killed when his aircraft was shot down over Bougainville on 18 April 1943.
The G4M was also, notoriously, one of the most vulnerable bombers of the war. Like the Mitsubishi A6M2 Zero and the Nakajima B5N Kate, it was built to a philosophy that traded protection for range and speed: it had no armour for its crew and no self-sealing fuel tanks, and its large, unprotected fuel tanks made it catch fire at the slightest hit.
Allied pilots called it the “flying lighter” and the “one-shot lighter”, and the name was earned: a G4M hit by a fighter’s burst often exploded or burned, with the loss of its entire crew. About 2,435 G4Ms were built, and the type served from the first day of the Pacific War to the last, ending its career as a carrier for the Yokosuka MXY-7 Ohka kamikaze aircraft and as the transport in which the Japanese surrender delegation flew to meet General MacArthur in August 1945.
1. Key Facts
| Role | Twin-engine land-based naval bomber (also torpedo bomber and transport) |
| Manufacturer | Mitsubishi Heavy Industries, Japan |
| Designer | Kiro Honjo / Kiro Honjo |
| First flight | 23 October 1939 |
| Introduced | June 1941 |
| Produced | About 2,435 |
| Crew | 7 (pilot, co-pilot, navigator, radio operator, gunners) |
| Engines | 2 × Mitsubishi Kasei 11 radial, about 1,530 hp each (later Kasei 22/25, up to about 1,850 hp) |
| Maximum speed | About 428 km/h (266 mph) |
| Range | About 2,852 km (1,772 miles) with bomb load; up to about 6,000 km ferry |
| Bomb load | 1 × 800 kg torpedo or up to 1,000 kg of bombs |
| Armament | 1 × 20 mm Type 99 cannon (tail); 4 × 7.7 mm Type 92 machine guns |
| Allied reporting name | “Betty” / “Betty” |
| Main users | Imperial Japanese Navy Air Service |
| Fate | Withdrawn 1945; none survives intact |
2. Origins and Requirements
A bomber with the range of a fighter
In 1937 the Imperial Japanese Navy issued a specification for a new land-based bomber to replace the Mitsubishi G3M, the aircraft that had bombed China since 1937. The specification called for a twin-engine bomber with a range of more than 4,800 kilometres — a figure that astonished the engineers who read it, since no bomber in the world could fly so far — and a speed of more than 400 km/h, with a bomb load of 1,000 kilograms.
The Navy wanted an aircraft that could strike targets across the vast distances of the Pacific, from bases in Japan to the Philippines, to Malaya, to the Dutch East Indies, and the range requirement was the heart of the design.
Mitsubishi’s chief designer, Kiro Honjo, and his team accepted the challenge, and the aircraft that resulted, the G4M, was built around a single idea: range above all else, even at the cost of protection.
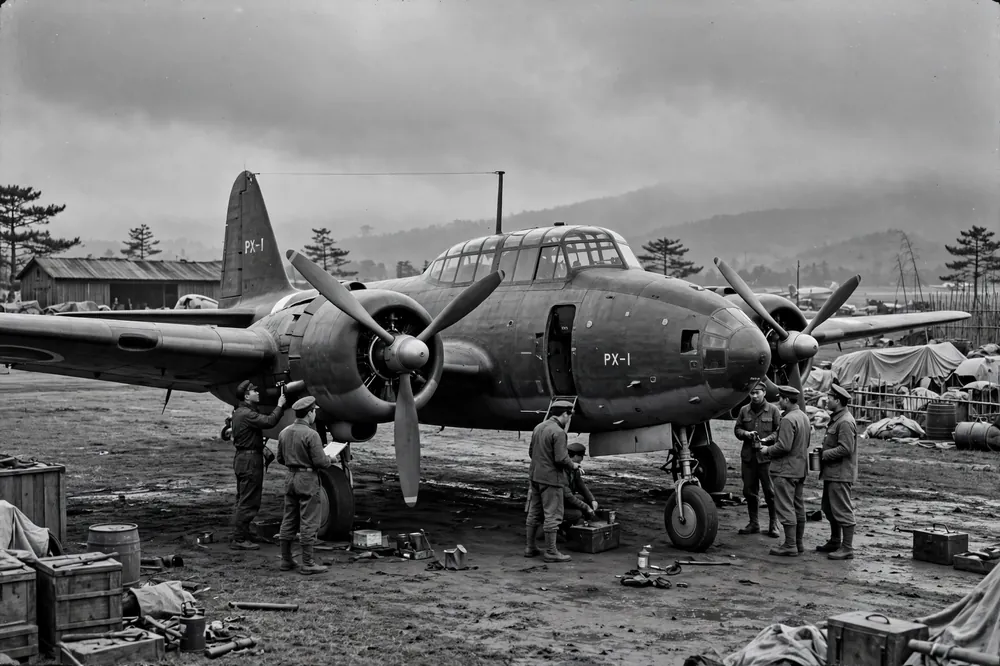
Honjo’s answer: lightness
Honjo’s solution was to build the aircraft as light as possible. He used a new wing design with a laminar-flow section, he fitted the aircraft with large fuel tanks that filled the wings and the fuselage, and he omitted the armour plate and the self-sealing fuel tanks that other bombers carried, saving hundreds of kilograms of weight.
The first prototype flew on 23 October 1939, and its performance exceeded the Navy’s expectations: it was faster than specified, and its range, with a reduced bomb load, approached 6,000 kilometres in ferry configuration. The Navy ordered it into production as the Navy Type 1 Land Attack Aircraft, and the first production aircraft reached the squadrons in June 1941, six months before the Pacific War began.
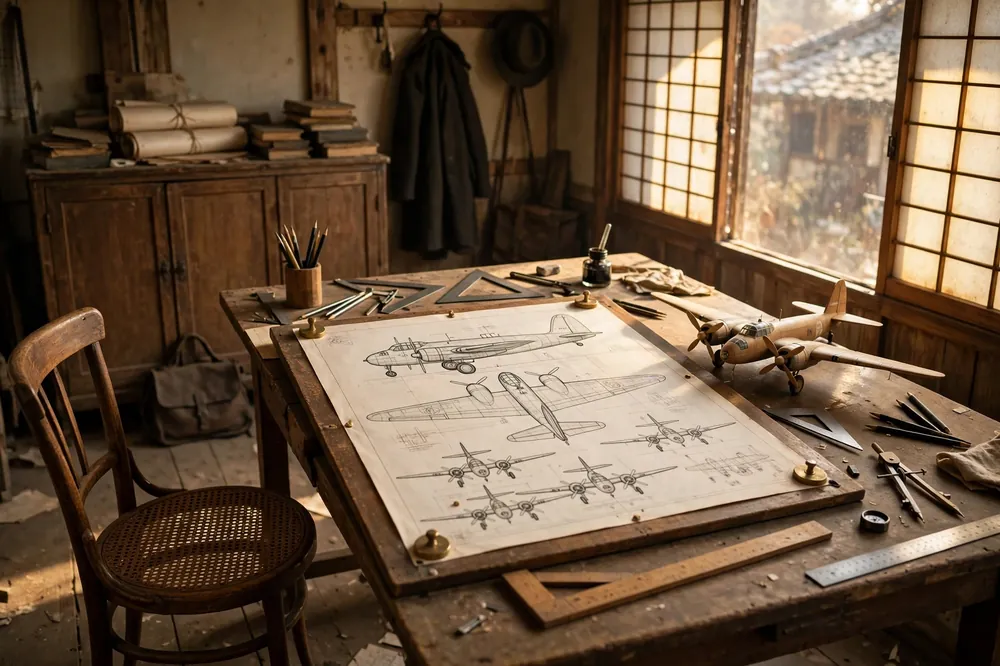
The price of range
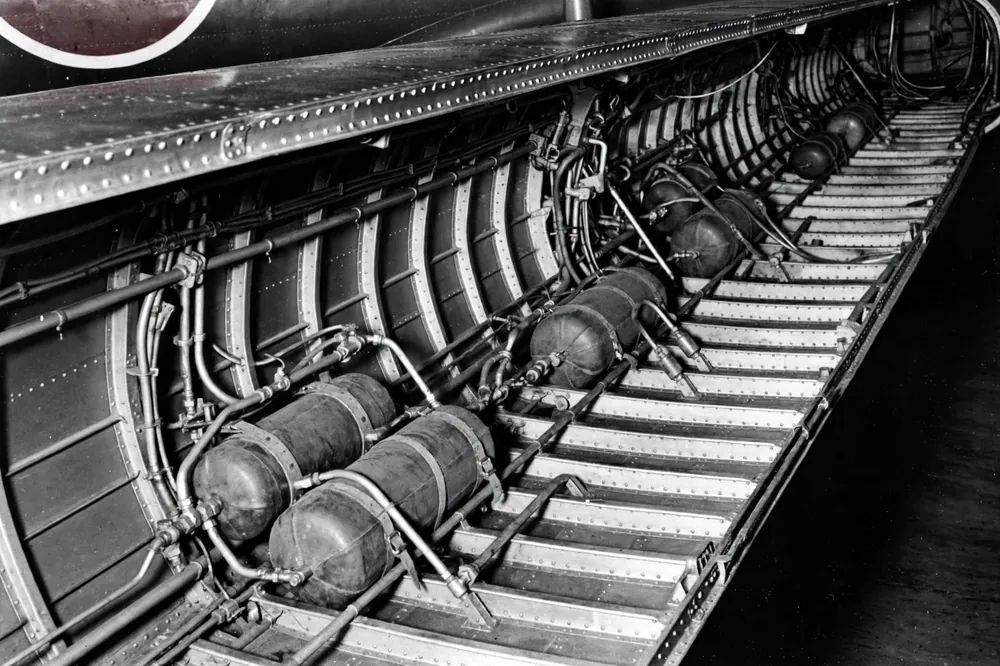
The G4M’s range was bought at a price that became clear only when the aircraft met serious opposition. The large fuel tanks, which gave the aircraft its range, were unprotected, and they were spread through the wings and the fuselage in a way that meant a hit almost anywhere could rupture a tank and start a fire.
The crew had no armour, the fuel system had no self-sealing liners, and the aircraft’s defensive armament — four 7.7 mm machine guns and a single 20 mm cannon in the tail — was inadequate against the fighters it met. In 1941, when the opposition was weak, these were acceptable trades.
By 1942, when the Allies fielded fast fighters and effective anti-aircraft fire, they became a death sentence, and the G4M’s loss rates were among the highest of any Japanese aircraft.
3. Design and Development
Airframe and the laminar-flow wing
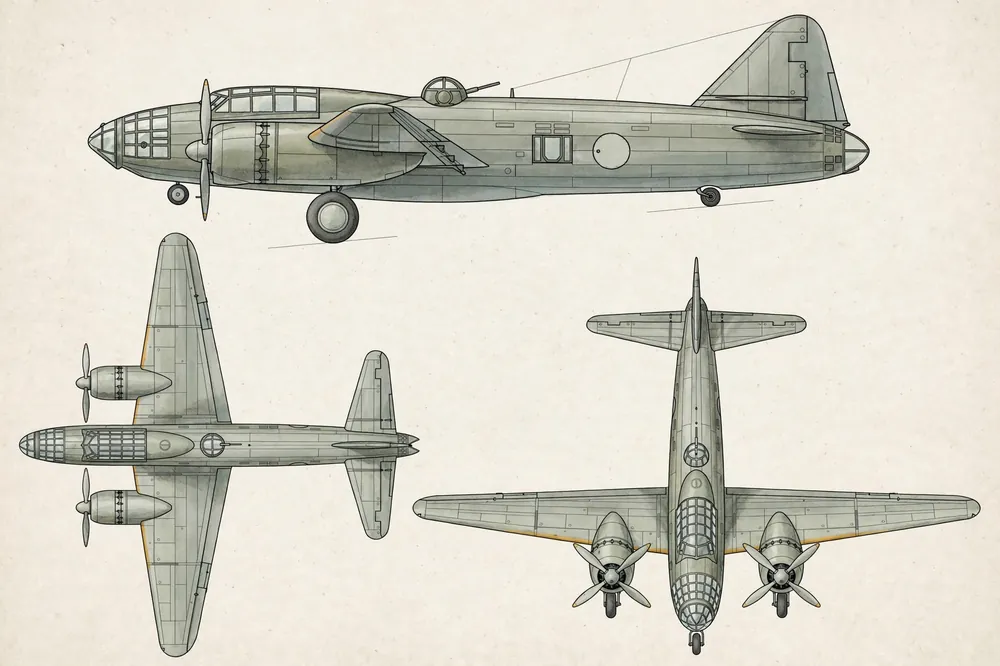
The G4M was a mid-wing monoplane of all-metal construction, with a long, cigar-shaped fuselage and a wing of about 25 metres span. Its most advanced feature was its wing, which used a laminar-flow aerofoil section — a wing profile designed to keep the airflow smooth over a larger part of the wing, reducing drag and increasing range. The laminar-flow wing was a new idea in 1939, and it was one of the first applications of the concept in a production aircraft, predating the American P-51 Mustang’s laminar-flow wing by several years. The wing carried the two Mitsubishi Kasei radial engines in nacelles at its leading edge, and the large fuel tanks that filled the wing’s structure.
The fuselage carried a crew of seven: the pilot and co-pilot in the cockpit, the navigator-bombardier in the glazed nose, the radio operator in the fuselage, and the gunners in the dorsal, ventral and tail positions. The tail gunner, who manned the 20 mm cannon in the tail, had the aircraft’s heaviest weapon, and the tail position was the G4M’s most effective defence, since a fighter attacking from behind — the most common angle of attack — had to face the cannon. The aircraft’s landing gear retracted into the engine nacelles, and the G4M’s overall appearance was clean and modern, with a long, graceful fuselage that belied its vulnerability.
Engines and the Kasei
The G4M’s engines were Mitsubishi Kasei radials, fourteen-cylinder, twin-row engines that were among the most powerful Japanese engines of the war. The early G4M1 used the Kasei 11 of about 1,530 horsepower, and later versions used the Kasei 22 and Kasei 25, of up to about 1,850 horsepower.
The Kasei was a reliable engine, and it gave the G4M a maximum speed of about 428 km/h and a cruising speed of roughly 320 km/h, with a range of about 2,852 kilometres with a normal bomb load. Later versions, with more powerful engines and self-sealing tanks, were faster and better protected, but they were also heavier, and their range was reduced — a trade that the Navy, by 1944, was willing to make, since the unprotected G4M had proved so vulnerable.
4. Technical Description
Armament and torpedo attack
The G4M was designed as a level bomber and a torpedo bomber, and it could carry either a single 800-kilogram Type 91 torpedo on a rack beneath the fuselage, or up to 1,000 kilograms of bombs in the internal bomb bay and on external racks.
The torpedo attack was the G4M’s most famous role: the aircraft would approach the target at low altitude, at a speed of roughly 250 km/h, and release the torpedo at a height of about 20 metres, in the same manner as the B5N Kate.
The G4M’s torpedo attacks off Malaya on 10 December 1941, in which the aircraft sank two capital ships, were the most successful torpedo attacks of the war’s opening months, and they demonstrated the effectiveness of the Japanese torpedo bomber force when it was properly used.
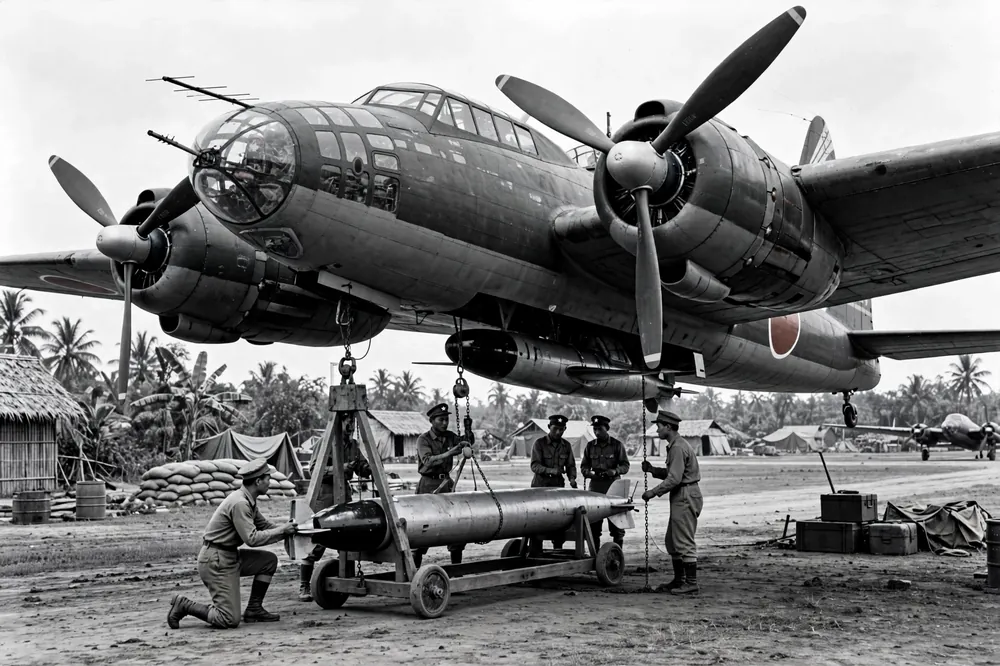
The G4M’s defensive armament was light for a bomber of its size. It carried four 7.7 mm Type 92 machine guns — in the nose, dorsal, ventral and waist positions — and a single 20 mm Type 99 cannon in the tail, manned by the tail gunner.
The tail cannon was the aircraft’s most effective weapon, and the tail gunner’s position, with its wide field of fire, was the G4M’s best defence. Later versions, the G4M2 and G4M3, increased the armament, adding a second 20 mm cannon in the dorsal turret and replacing some of the 7.7 mm guns with 13 mm machine guns, and they added armour and self-sealing tanks, but the early G4M1, which fought the opening campaigns, had none of these protections.
Crew roles and the “flying lighter”
The G4M’s crew of seven worked in a spacious fuselage, by the standards of Japanese bombers, and the aircraft was, in many respects, a comfortable machine to fly in. The pilot and co-pilot sat side by side in the cockpit, with a good view, the navigator-bombardier worked in the glazed nose, and the gunners manned their positions along the fuselage.
The crew’s comfort, however, was no protection against the aircraft’s vulnerability: the large, unprotected fuel tanks, which filled the wings and the fuselage, meant that a burst from a fighter could set the aircraft on fire in seconds, and the crew had no armour to protect them and no self-sealing tanks to stop the fire.
Allied pilots, who learned to aim for the wings, where the fuel tanks were, called the G4M the “flying lighter” and the “one-shot lighter”, and the name was earned in the skies over the Solomons and New Guinea, where G4Ms burned in large numbers.
5. Variants
The G4M family was large, and its versions reflected the type’s long service and the Navy’s attempts to correct its vulnerability. The G4M1, the first production version, was built in about 1,200 examples, with the Kasei 11 engine and the light defensive armament described above. The G4M2, introduced in 1943, had a more powerful Kasei 22 engine, a redesigned wing with a larger fuel capacity, and a heavier armament, including a dorsal turret with a 20 mm cannon. The G4M2a and G4M2e were further developments, the latter being the version adapted to carry the Yokosuka MXY-7 Ohka kamikaze aircraft beneath its fuselage.
The G4M3, introduced in 1944, was the most heavily protected version, with armour for the crew, self-sealing fuel tanks and a heavier armament, but it was also the heaviest, and its range was reduced. Only a small number were built, and the war ended before the G4M3 could replace the earlier versions in numbers. Other versions included the G4M1-L, a transport version with the armament removed and seats fitted for passengers, which was used to carry senior officers — including Admiral Yamamoto on his last flight — and the G6M1, a heavy fighter version with a large cannon armament that was built in small numbers and used as a trainer.
6. Combat Service
Malaya and the opening offensive
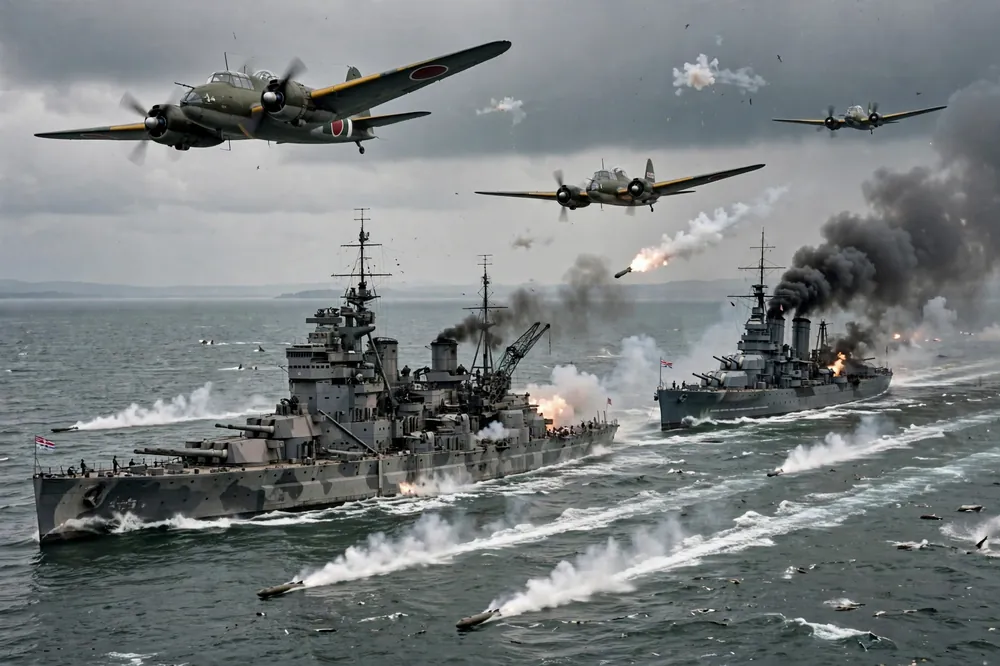
The G4M’s finest hour came on 10 December 1941, three days after Pearl Harbor. The British Eastern Fleet, under Admiral Sir Tom Phillips, had sailed from Singapore to intercept the Japanese landings in Malaya, with the battleship Prince of Wales and the battlecruiser Repulse, sailing without air cover.
Japanese aircraft from bases in Indochina, including 26 G4Ms and B5N Kates of the 22nd Air Flotilla, attacked the two ships in waves, and torpedoes from the G4Ms struck both vessels repeatedly until they sank with the loss of more than 800 men.
It was the first time in history that capital ships at sea had been sunk by air attack alone, and it sent a shock through the Royal Navy and through every navy in the world. The G4M had, in a single afternoon, changed the course of naval warfare.
Across South-East Asia
In the months that followed, the G4M supported the Japanese advance across South-East Asia, bombing Allied bases and shipping from the Philippines to the Dutch East Indies, and in the Indian Ocean raid of April 1942, G4Ms took part in the attacks that sank the British carrier Hermes off Ceylon. The aircraft’s long range let it strike targets that no other Japanese bomber could reach, and its crews, flying from bases in Indochina, in the Philippines and in New Guinea, became the long arm of the Japanese Navy’s air power.
The Solomons, New Guinea and the death of Yamamoto
The G4M’s fortunes changed in 1942, when the Allies began to win the air war in the South Pacific. At Guadalcanal, G4Ms flying from Rabaul to attack the American forces on the island were intercepted by Wildcats and, later, by Corsairs and Hellcats, and they were shot down in large numbers, their unprotected fuel tanks earning them the name “flying lighter”.
In New Guinea, G4Ms attacking the Allied airfields at Port Moresby met the same fate, and the type’s loss rates became so high that the Japanese Navy began to restrict its operations to night bombing, where the fighters could not find it.
The G4M remained in service, because there was nothing else, but its crews knew that a daylight mission was, in the words of one Japanese pilot, “a flight to the grave”.
18 April 1943: Yamamoto’s last flight
The G4M’s most famous mission was also its most tragic. On 18 April 1943, Admiral Isoroku Yamamoto, the Commander-in-Chief of the Combined Fleet, flew in a G4M1-L transport to inspect the Japanese forces on Bougainville. American intelligence, which had broken the Japanese naval code, learned of the flight, and a squadron of P-38 Lightnings was sent to intercept it.
The P-38s shot down Yamamoto’s G4M over the jungle of Bougainville, killing the Admiral and his staff, in one of the most consequential assassinations of the war. The loss of Yamamoto, the architect of Pearl Harbor and the most respected officer in the Japanese Navy, was a blow from which the Navy never recovered, and the G4M that carried him to his death has become, in the historical record, the aircraft of that fateful flight.
The last years: Ohka carrier and surrender
In the last year of the war, the G4M served in a new and desperate role: as the carrier for the Yokosuka MXY-7 Ohka, the rocket-powered kamikaze aircraft that was slung beneath the G4M’s fuselage and released near the target.
The G4M2e, the version adapted for this role, was slow and vulnerable, and many were shot down by American fighters before they could release their Ohkas, but the Ohka attacks that did get through sank or damaged several American ships, including the destroyer Mannert L. Abele, the first ship sunk by an Ohka.
The G4M’s last mission of the war was a peaceful one: in August 1945, two G4M1-L transports, painted white with green crosses, carried the Japanese surrender delegation to Ie Shima, where they met General MacArthur’s representatives and arranged the surrender that ended the war.
7. Specifications
The figures below are for the G4M1, the main version of the opening campaigns. Sources differ slightly on weights and performance, and the aircraft’s figures varied with load and the condition of the individual machine.
| G4M1 | |
|---|---|
| Length | 19.63 m / 19,63 m |
| Wingspan | 25.00 m / 25,00 m |
| Height | 4.10 m / 4,10 m |
| Wing area | 78.1 m² / 78,1 m² |
| Empty weight | About 6,741 kg |
| Loaded weight | About 12,860 kg |
| Engines | 2 × Mitsubishi Kasei 11, about 1,530 hp each |
| Maximum speed | About 428 km/h |
| Cruising speed | About 320 km/h |
| Range | About 2,852 km with bomb load; up to about 6,000 km ferry |
| Service ceiling | About 8,500 m |
| Bomb load | 1 × 800 kg torpedo or up to 1,000 kg bombs |
| Armament | 1 × 20 mm Type 99; 4 × 7.7 mm Type 92 / 1 × Type 99 20 mm; 4 × Type 92 7,7 mm |
| Crew | 7 |
Against its contemporaries the G4M was long-ranged but vulnerable. The American B-25 Mitchell, the closest Allied equivalent, was faster, better armed and far better protected, but it could not match the G4M’s range. The British Vickers Wellington was comparable in bomb load and speed, but it was also better protected. The G4M’s advantage lay in its range and in the skill of the crews who flew it in the opening months of the war, when the opposition was weak. Its disadvantage, the lack of protection, was shared with the Zero and the Kate, and it was a disadvantage that only became decisive when the Allies began to win the air war.
8. Operators
The G4M was operated exclusively by the Imperial Japanese Navy Air Service, and within the Navy it served in the land-based air flotillas that fought the opening campaigns of the Pacific War. Its principal units were the 22nd Air Flotilla, which sank Prince of Wales and Repulse off Malaya, the 24th Air Flotilla in the Central Pacific, and the units based at Rabaul, which fought the long campaign for the Solomons and New Guinea. The Japanese Army, which operated its own air force, did not fly the G4M: it had its own bombers, notably the Mitsubishi Ki-21, and the two services’ aircraft were rarely interchangeable.
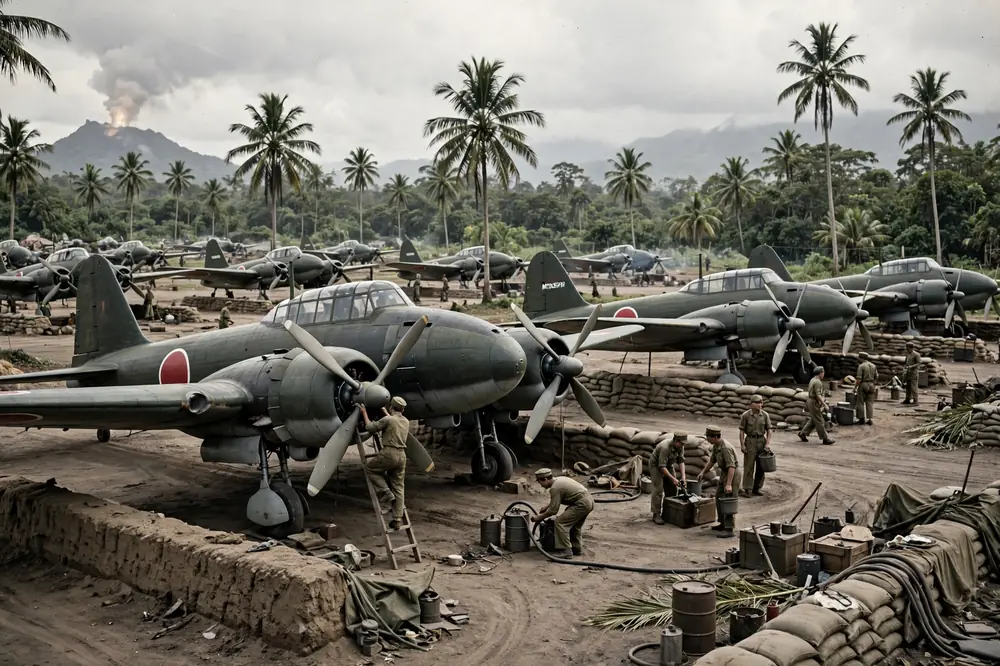
No other country operated the G4M in combat during the war, though captured examples were examined by Allied technical teams after the war, and at least one G4M was flown by the Americans in tests. After the war, a small number of G4Ms were used by the Indonesians in their struggle for independence, and a few were used as transports, but the type’s combat career ended with Japan’s surrender in 1945.
9. Legacy and Assessment
The bomber that changed naval warfare
The G4M’s legacy is bound up with the sinking of Prince of Wales and Repulse on 10 December 1941. That single afternoon, in which G4Ms and Kates sank two capital ships at sea by air attack alone, changed the course of naval warfare: it proved that the battleship, the queen of the seas for a century, was vulnerable to air attack, and it hastened the rise of the aircraft carrier as the capital ship of the future. The G4M was, in that sense, one of the most consequential aircraft of the war, and its name is linked, in the historical record, to the moment when sea power passed from the battleship to the aeroplane.
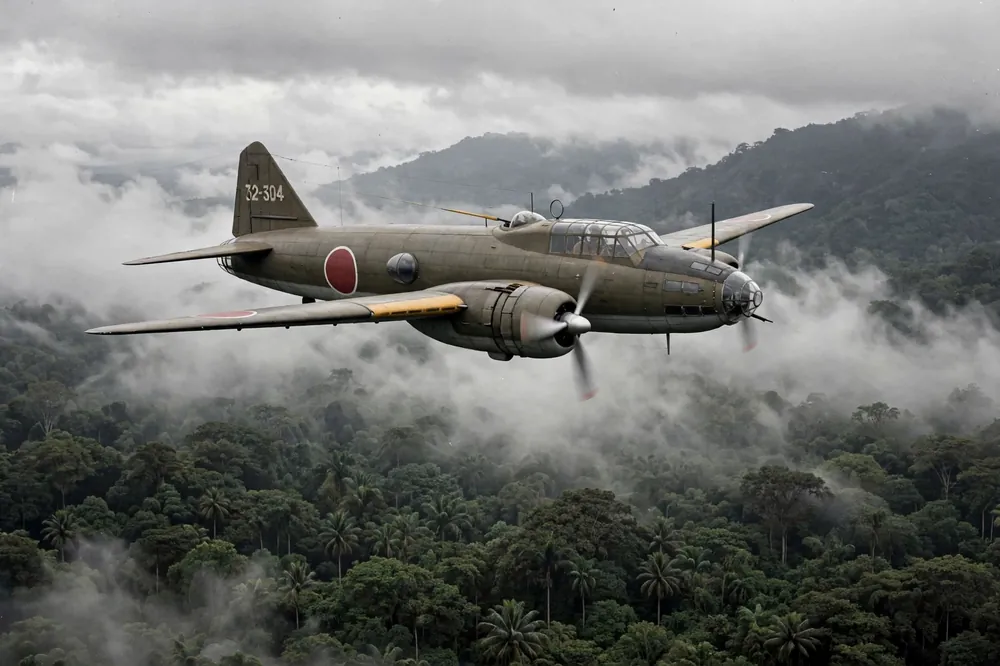
The G4M is also remembered for its vulnerability, and for the nickname — the “flying lighter” — that has outlived the war. The aircraft’s story is a warning about the dangers of a design philosophy that trades protection for performance, and about the limits of a design that has no margin for the day the enemy gets better.
The G4M was, in 1941, a superb long-range bomber, and its crews were among the best-trained in the world. By 1943, it was a death trap, and its crews died in numbers that Japan could not afford. The aircraft’s story is, in the end, the story of Japanese naval air power itself: brilliant, audacious and doomed by the very qualities that made it brilliant.
Survivors
No complete original G4M survives. Wreckage has been recovered from the Pacific, and parts are displayed in museums in Japan and in the United States, but no intact aircraft exists, and no airworthy example flies today. The last G4Ms were destroyed on the ground or scrapped after the surrender in August 1945, and the type lives on in models, in photographs, and in the historical record, where it remains one of the most studied Japanese aircraft of the war, and in the memory of the sinking of Prince of Wales and Repulse, the afternoon that changed naval warfare.
10. FAQ
What was the Mitsubishi G4M Betty? / Mitsubishi G4M Betty là gì?
The Mitsubishi G4M Betty was the Imperial Japanese Navy’s principal land-based bomber of the Second World War, designed by Kiro Honjo and first flown on 23 October 1939. It was a twin-engine bomber with a crew of seven, a range of nearly 3,000 kilometres with a bomb load and up to about 6,000 kilometres in ferry configuration, and a bomb load of up to 1,000 kilograms or a single 800-kilogram torpedo. It entered service in June 1941, and it was the aircraft that sank the British battleship Prince of Wales and the battlecruiser Repulse off Malaya on 10 December 1941, in the first sinking of capital ships at sea by air attack alone.
How many G4Ms were built?
About 2,435 G4Ms were built in total, most of them the G4M1 and G4M2 versions, at Mitsubishi’s factories in Japan. This was a substantial production run, and the G4M was one of the most numerous Japanese bombers of the war, serving from the first day of the Pacific War to the last, in every theatre from Malaya to the Solomons, New Guinea and the Philippines. The production run reflected the Navy’s reliance on the type as its principal land-based bomber, and the aircraft’s long service — from June 1941 to August 1945 — was a measure of its importance, even as its vulnerability became more apparent with each year of the war.
Why was the G4M called the “flying lighter”?
Allied pilots called the G4M the “flying lighter” and the “one-shot lighter” because its large, unprotected fuel tanks caught fire at the slightest hit. The aircraft had no armour for its crew and no self-sealing fuel tanks, a deliberate trade for range and speed that was shared with the Zero and the Kate, and its fuel tanks, which filled the wings and the fuselage, meant that a burst from a fighter could set the aircraft on fire in seconds, with the loss of its entire crew.
Allied pilots learned to aim for the wings, where the fuel tanks were, and the name was earned in the skies over the Solomons and New Guinea, where G4Ms burned in large numbers in 1942 and 1943.
What role did the G4M play in the death of Admiral Yamamoto?
Admiral Isoroku Yamamoto, the Commander-in-Chief of the Combined Fleet and the architect of the Pearl Harbor attack, was flying in a G4M1-L transport, a passenger version of the Betty with its armament removed and seats fitted, to inspect the Japanese forces on Bougainville on 18 April 1943, when American P-38 Lightnings, acting on intelligence from the broken Japanese naval code, intercepted and shot down his aircraft over the jungle, killing Yamamoto and his staff. The loss of Yamamoto, the most respected officer in the Japanese Navy, was a blow from which the Navy never recovered, and the G4M that carried him to his death has become, in the historical record, the aircraft of that fateful flight.
Did the G4M carry the Ohka kamikaze?
Yes. The G4M2e was adapted to carry the Yokosuka MXY-7 Ohka, a rocket-powered kamikaze aircraft, slung beneath its fuselage and released near the target, where the Ohka’s pilot would dive onto the ship at high speed. The G4M2e was slow and vulnerable, and many were shot down by American fighters before they could release their Ohkas, but the Ohka attacks that got through sank or damaged several American ships, including the destroyer Mannert L. Abele, the first ship sunk by an Ohka, in April 1945. The Ohka programme was a measure of Japan’s desperation in the last year of the war, and the G4M’s role as its carrier was the type’s last combat mission.
Does any G4M survive today?
No complete original G4M survives. Wreckage recovered from the Pacific and parts are displayed in museums in Japan and the United States, but no intact aircraft exists, and the type is known today from photographs, from models and from the historical record, where it remains one of the most studied Japanese aircraft of the war. The G4M’s story survives in the memory of the sinking of Prince of Wales and Repulse, the afternoon that changed naval warfare, and in the memory of Yamamoto’s last flight, and in the nickname — the flying lighter — that has outlived the war itself.
11. Sources
- Wikipedia, “Mitsubishi G4M” — production figures (about 2,435 built), first flight, performance data and service history.
- René J. Francillon, Japanese Aircraft of the Pacific War (Putnam, 1970) — the standard English-language reference on the G4M’s design, development and variants.
- Mark R. Peattie, Sunburst: The Rise of Japanese Naval Air Power, 1909–1941 (Naval Institute Press, 2001) — the doctrine and the range requirement behind the Betty.
- Jonathan Parshall and Anthony Tully, Shattered Sword (Potomac Books, 2005) — the G4M at Midway and in the Solomons.
- John Toland, The Rising Sun: The Decline and Fall of the Japanese Empire, 1936–1945 (Random House, 1970) — the sinking of Prince of Wales and Repulse and the death of Yamamoto.
- United States Strategic Bombing Survey, The Japanese Aircraft Industry (1947) — wartime production figures and engine data.
- Osamu Tagaya, Mitsubishi Type 1 Rikko ‘Betty’ Units of World War 2 (Osprey, 2001).
- Henry Sakaida, Imperial Japanese Navy Aces 1937–45 (Osprey, 1998).